Colour stripes

Each type of loop join can be used to work stripes. The method you choose will depend on the width of the stripes: the loop join and sliding join would be used for narrow stripes, and the two-loop join for wide stripes (colour blocks). Here are all the methods in details.

The loop join

The loop join shown on a single row of a new colour

1. To start a new colour, make a loop at the end of the new yarn (see main instructions) and hang the loop on the right needle.  2. Work the first stitch using the new yarn, tighten the yarn to adjust the stitch size. Continue as usual. 3. To finish, work to the last stitch, pierce the yarn with a removable marker to mark end of this colour.  4. Cut or tear the yarn 5 cm (2”) after the marker.  5. Unravel a few stitches to have enough yarn length to make the loop [10-20 cm (6-8”)].  6. Fold over the yarn and make the loop where the marker is positioned (see main instructions).  7. Reknit the unravelled stitches (*).  8. Hang the end loop on the right needle to anchor the yarn end.
* – It can be tricky to knit right to the end of the yarn. To help, you can hang a marker on the loop (see video) or put some scrap yarn through the loop to keep the tension (this was a clever suggestion of my technical editor, thank you James).

In the next row the first and last stitches are doubled with the loops. These loops do not count as stitches, and should be worked together with the adjacent stitch. Looking from the right side of the knitting, the stitch should be always in front of the loop.

9. On the right side of knitting, at the beginning of the row, you can see the first stitch is doubled with the loop. 10. Work the doubled stitch using k2tog (WS: p2tog tbl). 11. At the end of the row, you can see the last stitch is doubled with the loop.  12. Work the doubled stitch as ssk (WS: p2tog).

The sliding loop join

The sliding loop join shown on multiple thin stripes of new colour
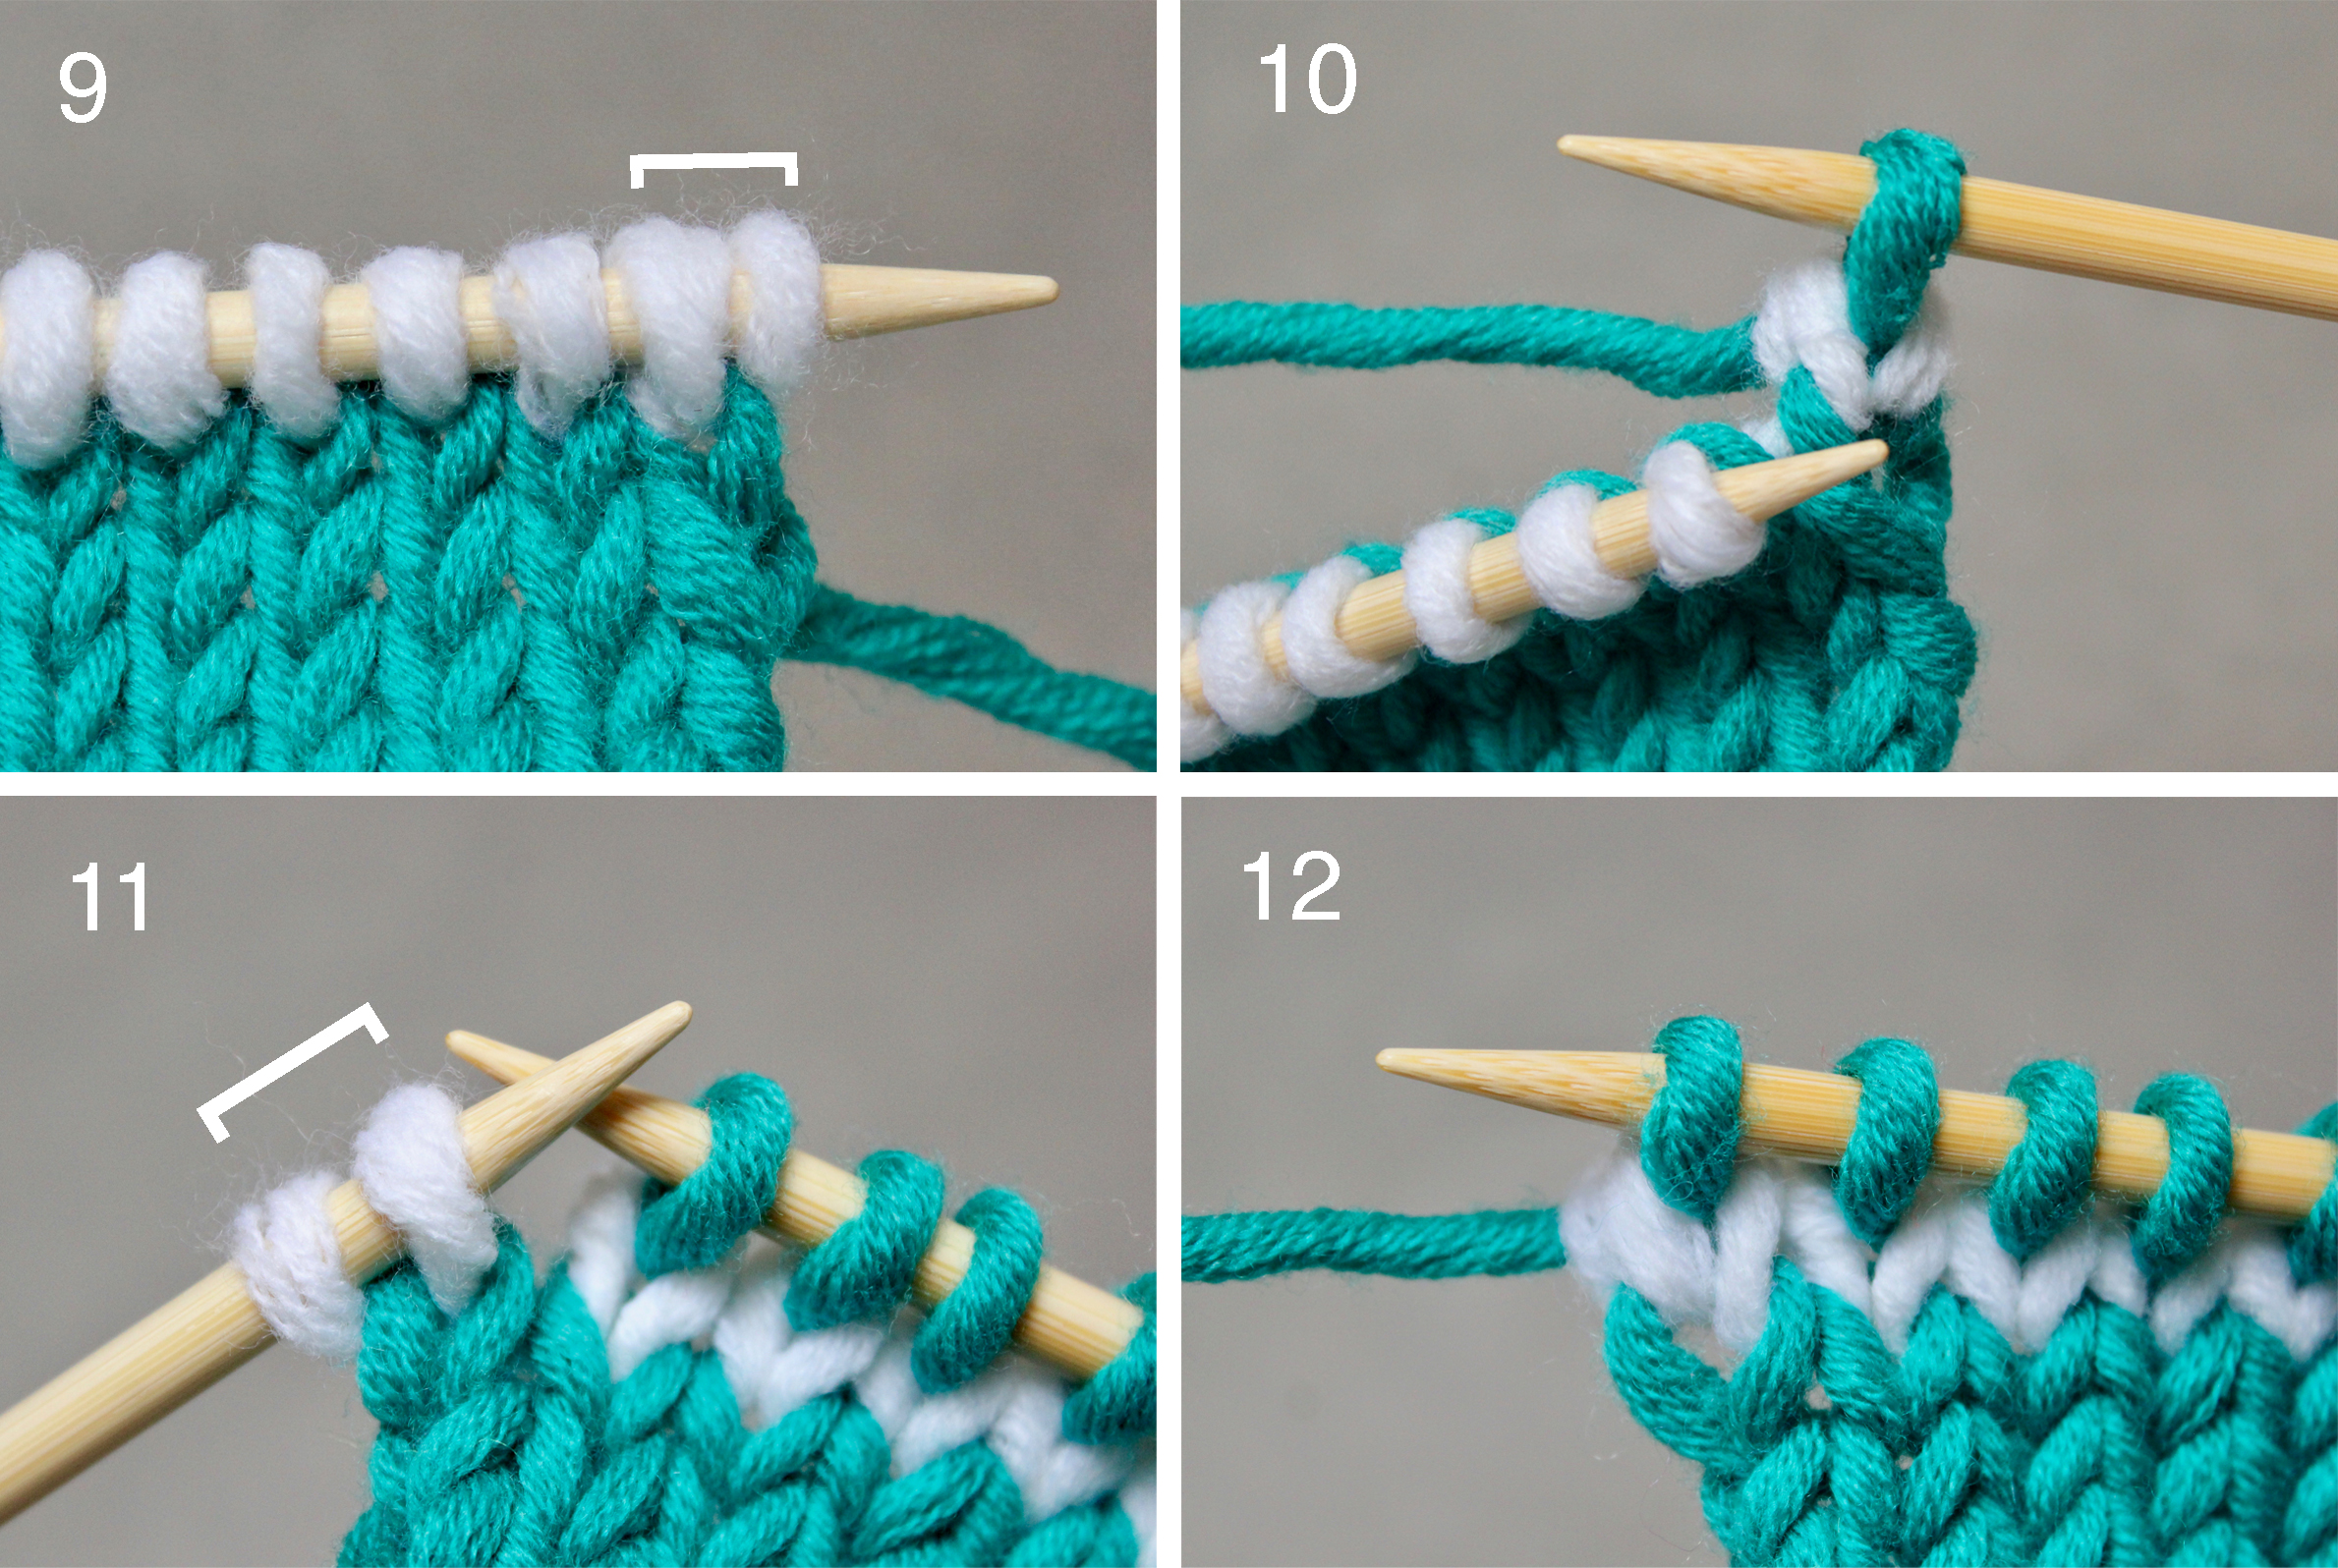
1. When starting to knit with a new colour, before making the loop, pass the new yarn end under the current yarn. 2. Make the loop (see main instructions). 3. Slide the loop right down to the first stitch. 4. Start to work the stitches using the new yarn. Continue as usual.
1. To finish, work to the last stitch, pierce the yarn with a removable marker to mark the end of this colour. 2. Cut or tear the yarn 5 cm (2”) after the marker and unravel a few stitches to have enough yarn length to make the loop [10-20 cm (6-8”)]. 3. To connect the loop with the continuing yarn, pass the yarn end under the next yarn and make the loop (see main instructions). 4. Reknit unravelled stitches. Pull the excess of the next yarn through the loop end.

The two-loop join

The two-loop join shown on multiple wide stripes

This method is recommended for wide stripes and colour blocks, when the current colour is replaced with the new one (i.e. there is no second colour yarn carried at the side of the work).

1. Every time you need to change the colour, work to the point where the current colour will end. 2. Pierce the yarn with a removable marker to mark the end of this colour. 3. Cut or tear the yarn 5 cm (2”) after the marker and unravel a few stitches to have enough yarn length to make the loop [10-20 cm (6-8”)]. 4. To connect the loops, interweave the yarn ends and make the loops (see main instructions). 5. Rework the unravelled stitches and continue with the new colour. The place where the colour changes is very neat and has no ends to weave (<). 6-9. Repeat above steps (1-4) above every time you start a new colour.

Black and white stripes: compare the conventional edge that has two tails of yarn for each colour change (bottom part) and the two loops join edge that has no ends (top part), RS and WS:

The stripes samples were made using:

Merino Extrafine Big by Patons UK, 44 yards (40 metres) / 50 g, 100% Merino wool
Polar by Wolle Rödel , 52 yards (48 metres) / 50 g, 50% Wool, 50% Acrylic
Superba Harmony 4 ply by Rico Design, 437 yards (400 metres) / 100 g, 75% Wool, 25% Polyester;
and other similar sock yarns