Those of us who are familiar with multi-coloured knitting know that to finish a project, we need to do the tedious job of hiding all the yarn ends, two for each colour. Nobody likes the job because it is not as exciting as the knitting itself, and the result is rarely perfect. Untidy weaving is not so important for projects which have a wrong side, but when both sides of the knitting are visible, there is nowhere to hide this imperfection.
In October 2014 I worked out a new method of solving the problem of yarn ends. The idea came from a dream: “How wonderful it would be if knitting always started with the first stitch and finished with the last stitch, with no loose ends to weave” I called the method the loop join. It works for yarns that can be sufficiently felted.
It is often thought that only pure wool can be felted, but I have successfully felted wool-acrylic yarns and super-wash sock yarns with nylon. The best yarns for felting are roving yarns.
Making the loop (instructions)
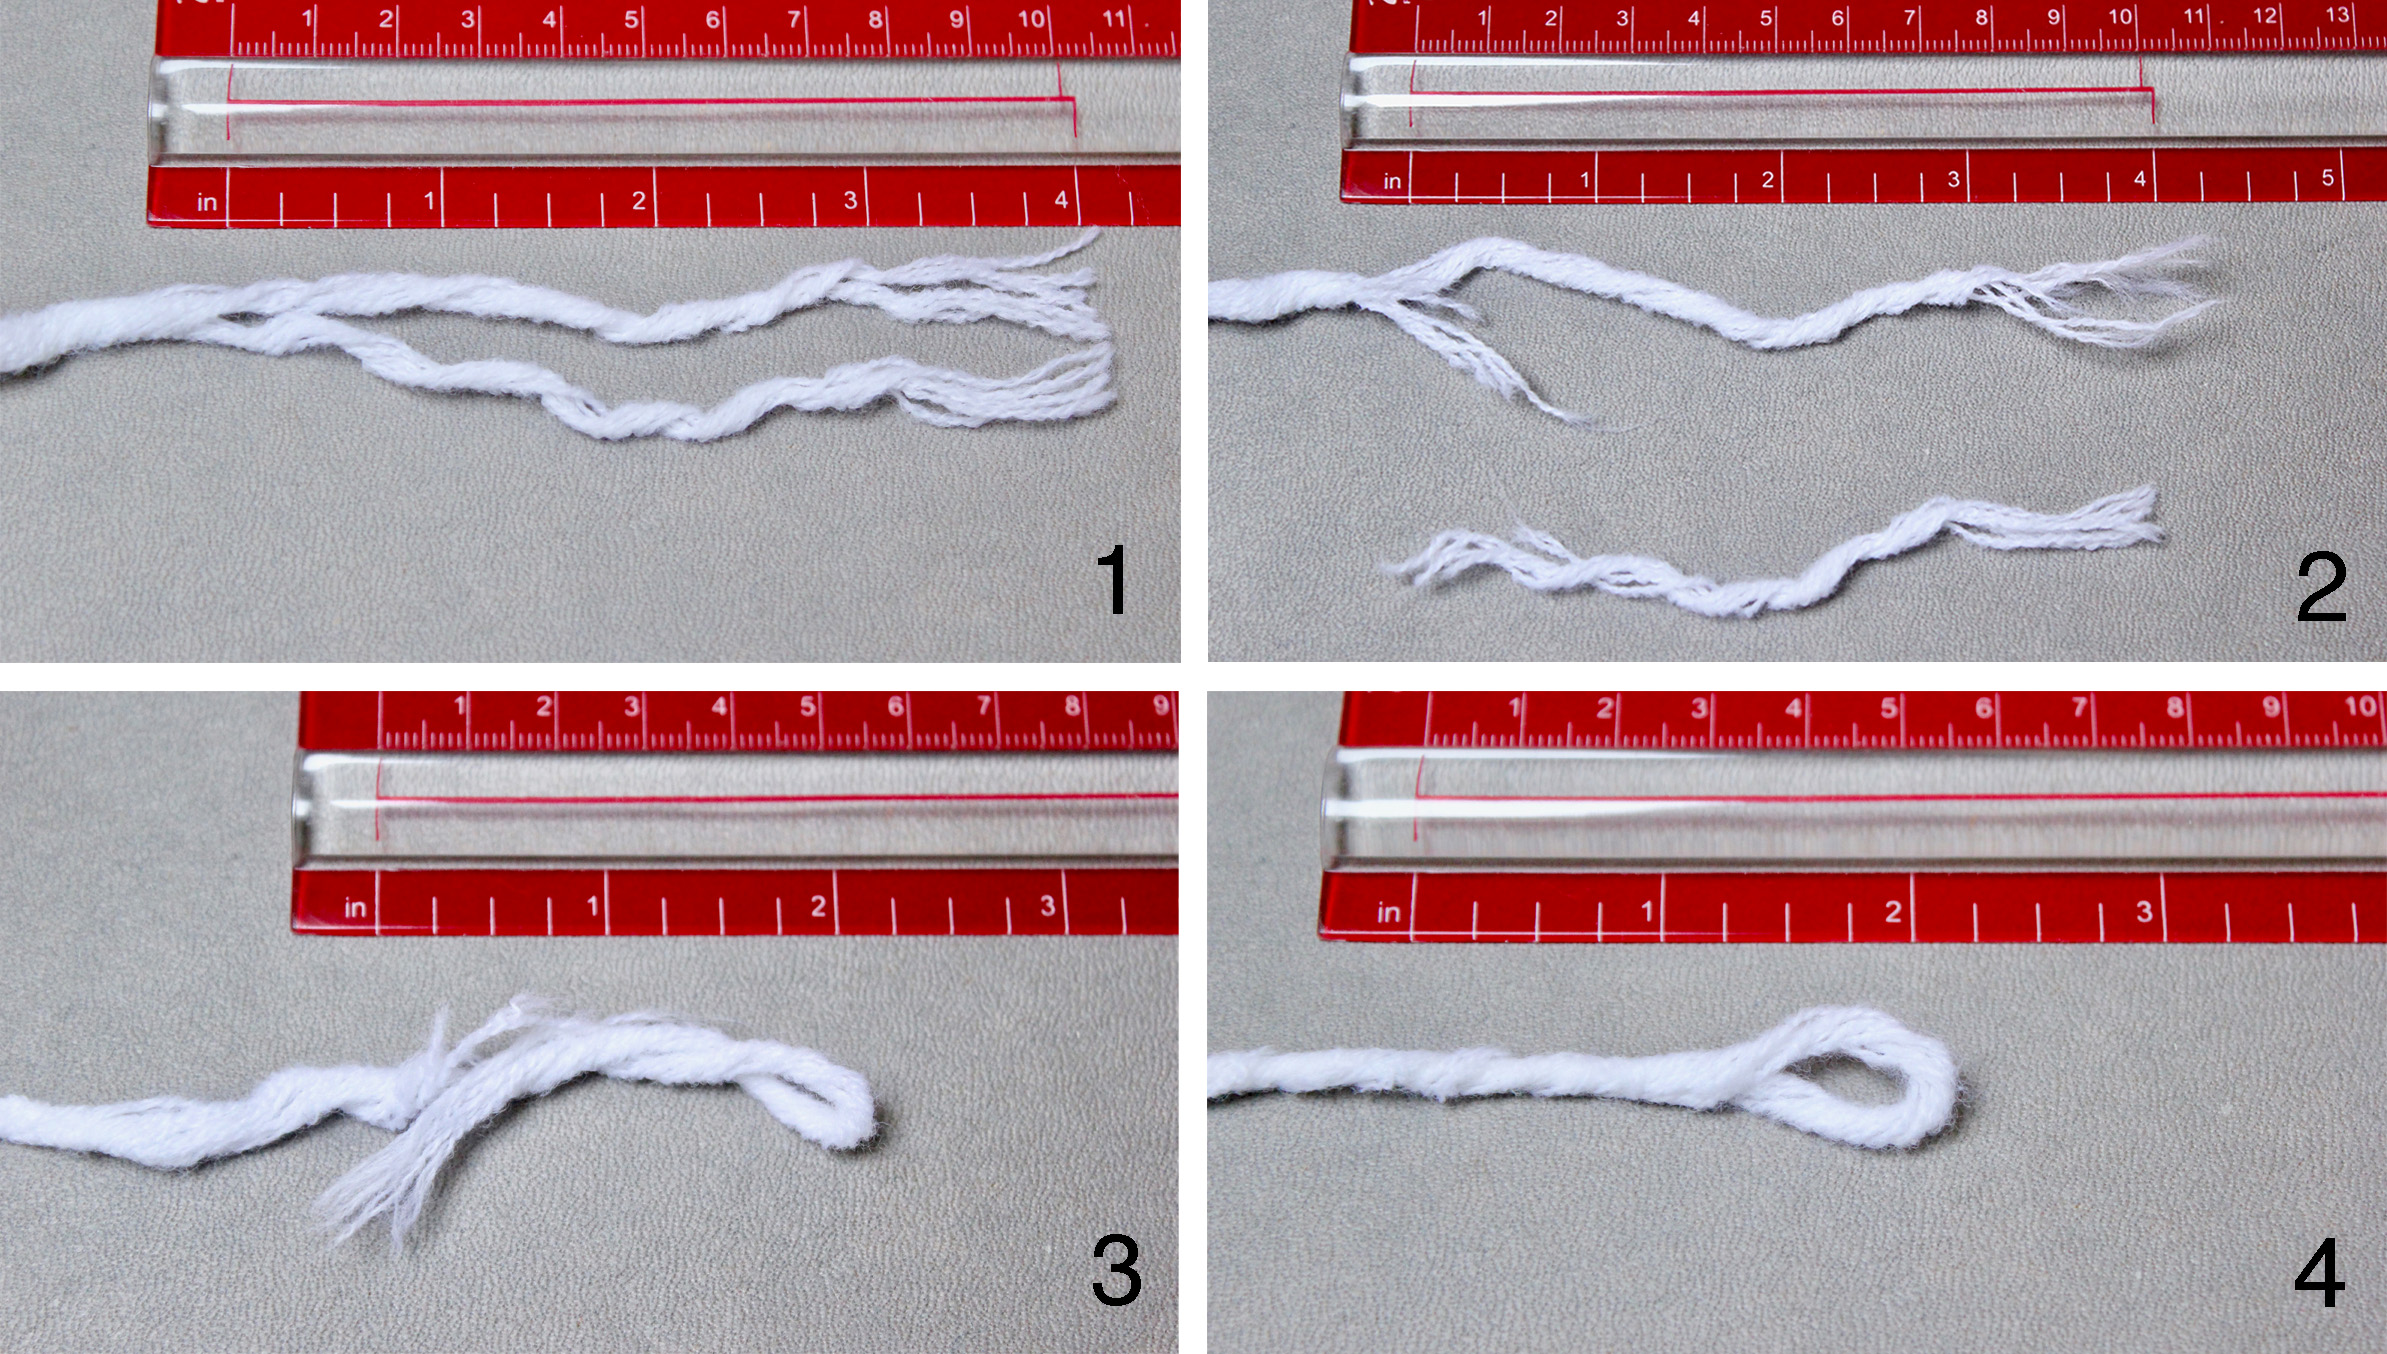
Whenever we need to start or finish working with a yarn, we always make this loop. It may seem tedious, but after some practice you will do it in 2-3 minutes.
There are 3 variations of the loop join for different tasks:
1. The loop join – for adding another working yarn (intarsia, narrow stripes, Fair Isle). This method can also be used to prevent tails at the cast-on edge.
2. The sliding loop join– for adding another working yarn (intarsia, narrow stripes, Fair Isle).
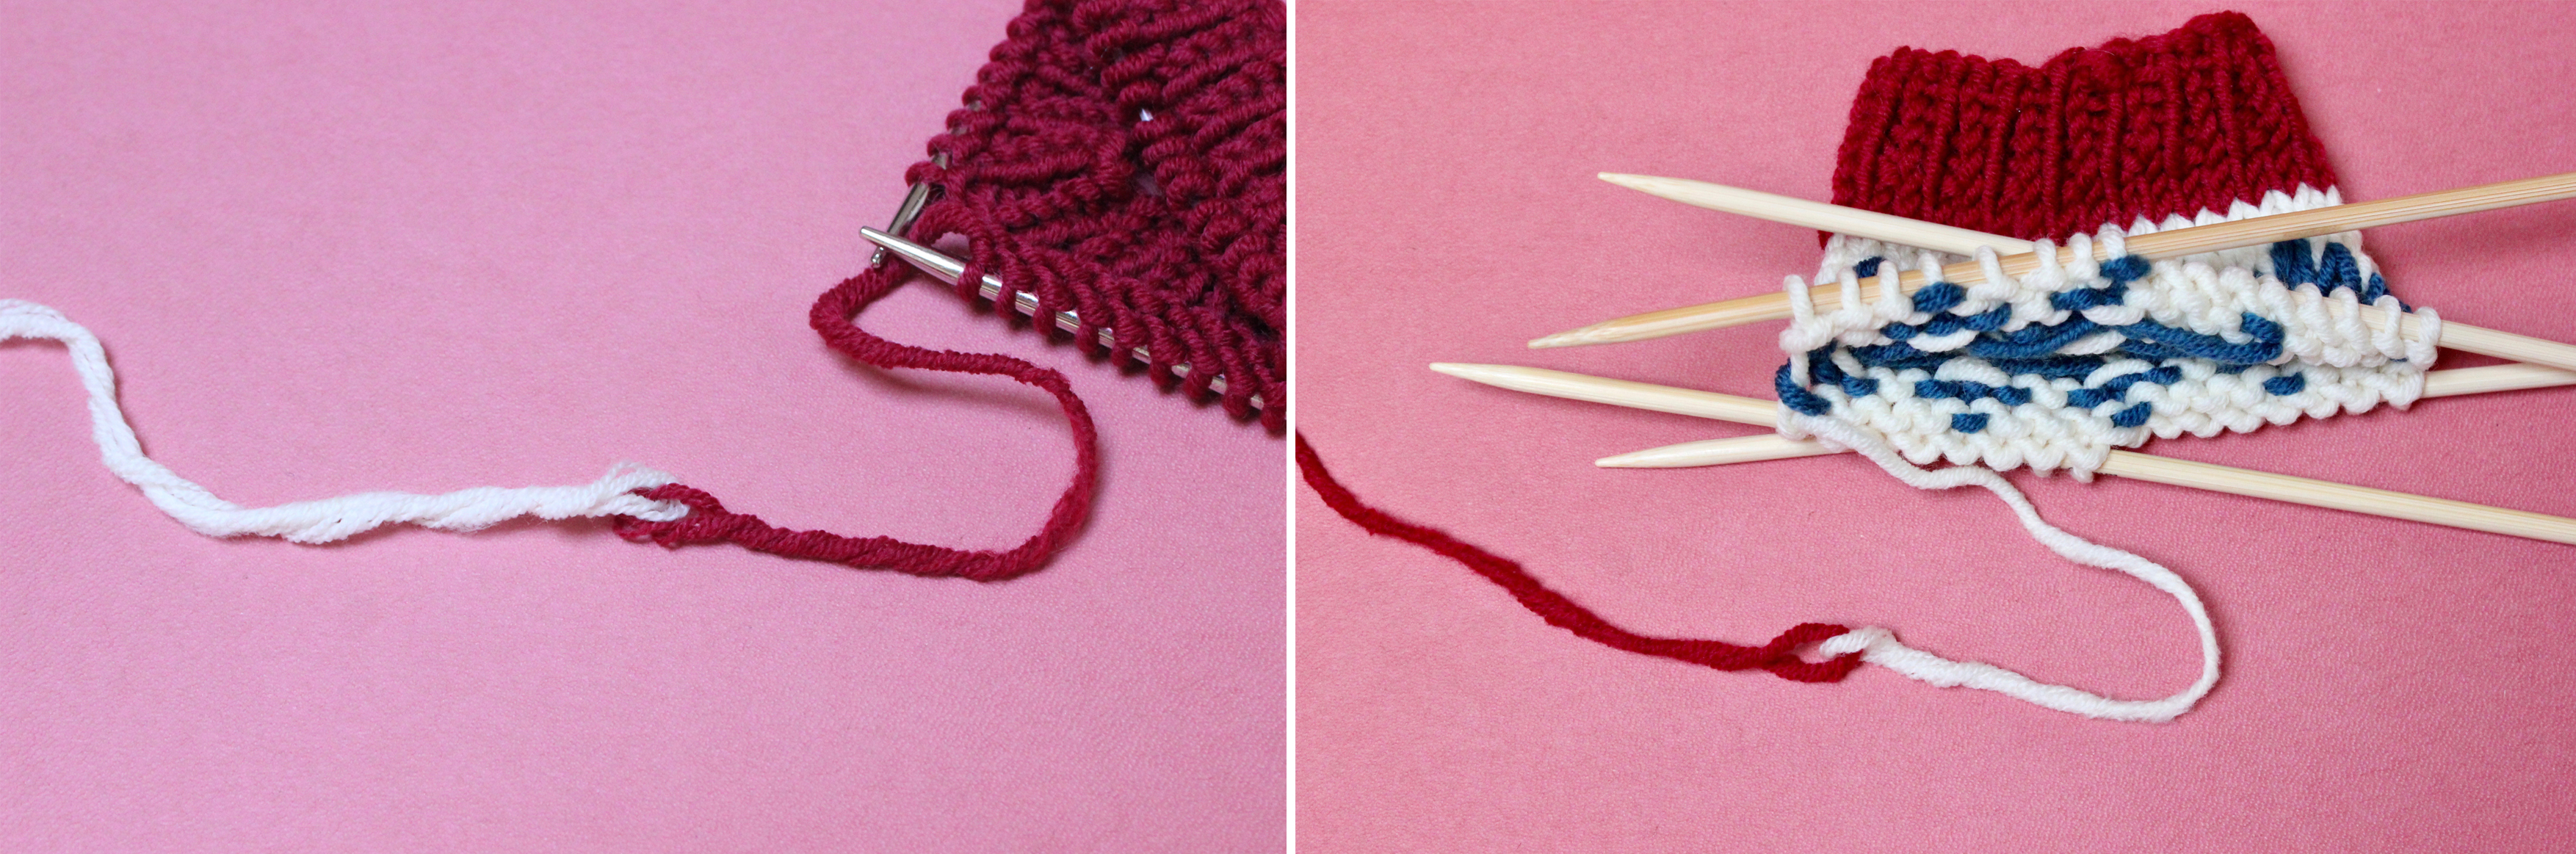
3. The two-loop join – for replacing the working yarn (wide stripes, colour blocks, Fair Isle). This method can also be used to join the next ball of the same yarn.
1. The loop join
a) To start the new colour yarn make a loop and place it on the right needle. b) To finish, knit to the end, place a marker in the yarn where the end loop should be, cut a 5 cm (2”) tail, and then unravel enough stitches to make the loop. Knit to the end again and place the loop on the right needle.
These loops do not count as stitches, and in the next row/round they should be worked together with the adjacent stitch of the same colour using e.g. k2tog/ssk. Looking from the right side of the knitting, the stitch should be always in front of the loop after decreasing.

2. The sliding loop join
Work as for the loop join (1a & b), however make the loops around the working yarn and do not place them on the needles.

3. The two-loop join
Work as for the finishing loop join (1b) to make a loop at the end of the current yarn. Then with the next yarn, make the starting loop (1a) passing it through the finishing loop to join the two yarns together. Equally, to connect the loops, you may interweave the yarn ends and make the loops.
Pros and cons of the loop join method
- The main benefit is that there are no ends to weave after the knitting is finished.
- This way the join is practically invisible: this is essential for two-sided projects.
- Another advantage is an absolute minimum of yarn waste.
- With the woven ends there is always a danger that they can become undone after wearing and washing. This is not the case with the loop join which is strong after being felted.
It’s true that the method does require time and attention. But, with practice, the loop join method will take you no more time than you would normally spend weaving in the ends. So you will create a perfect finish as you knit, without actually expending any more time.
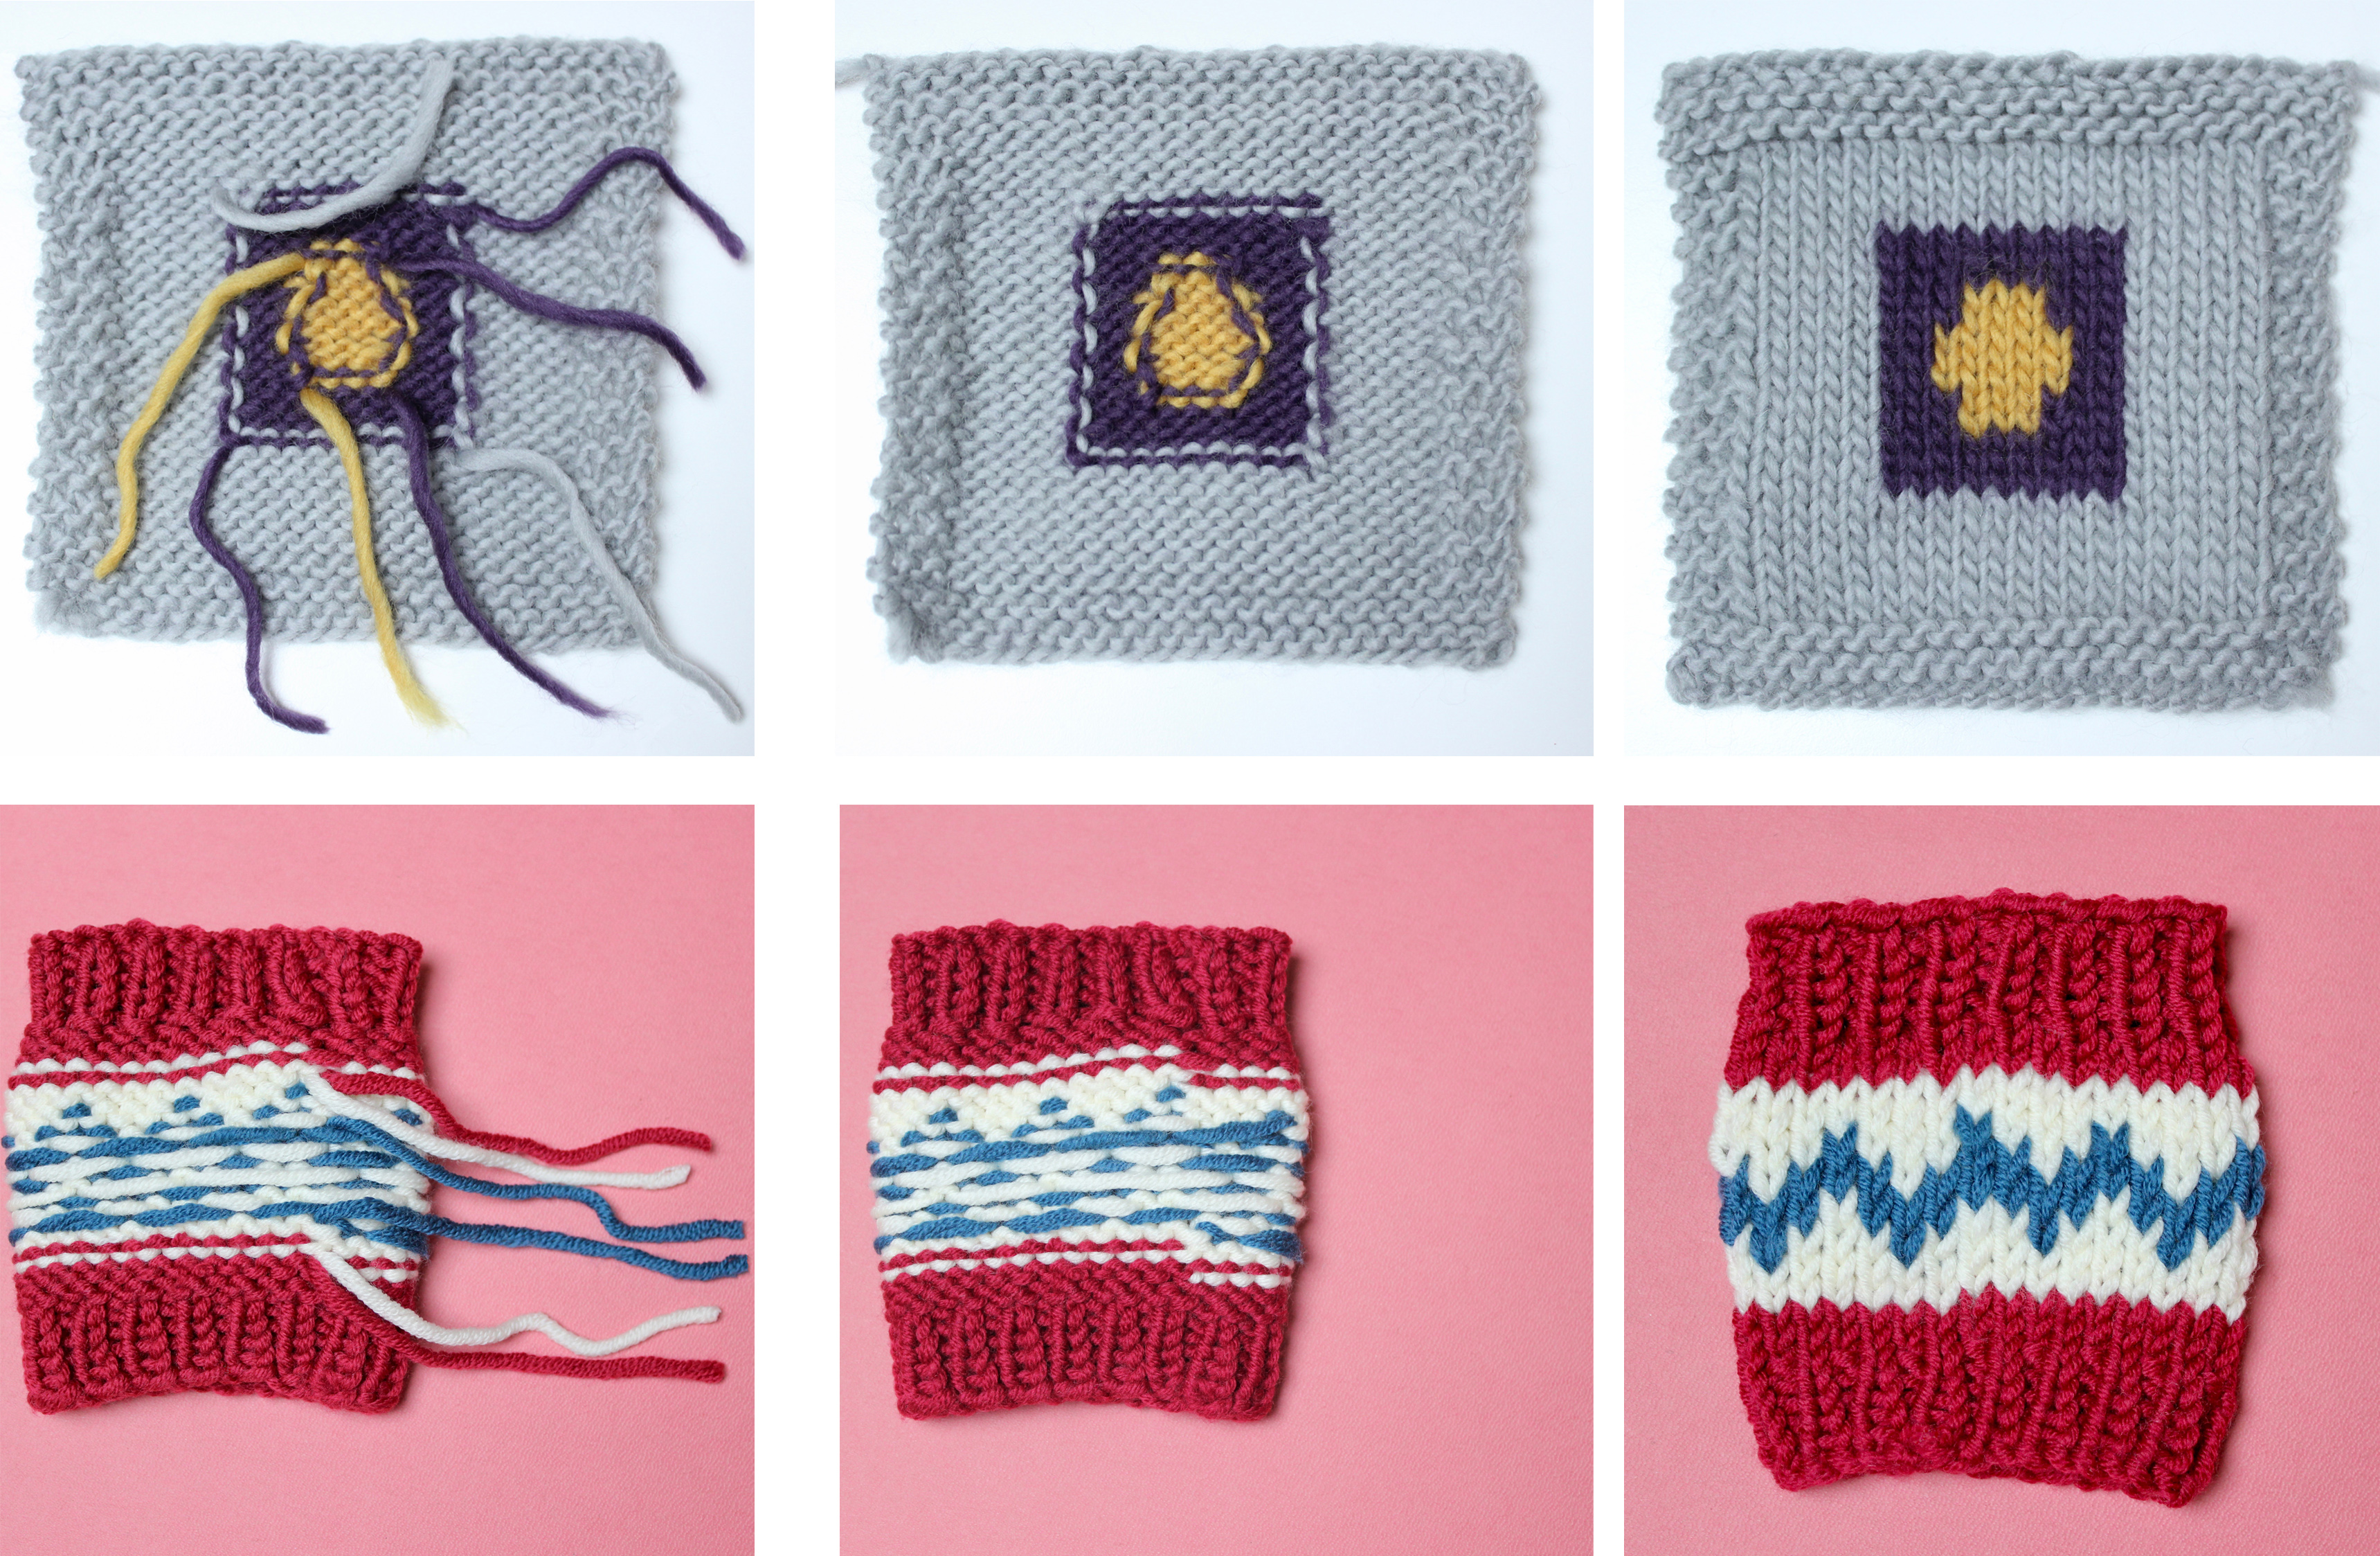
Here are two examples: intarsia, and a wide stripe with fairisle knitting in the round. The picture on the left shows how the sample will look if worked with the usual methods – with many loose ends. The two pictures on the right show samples worked by using the loop join methods (both sides):
When to use loop joins
To summarise, use a loop join whenever you work with two or more colours. There are two short videos here:
https://www.youtube.com/watch?v=M7yxA3hbzv
https://www.youtube.com/watch?v=fcriLS4AZwk
In the next tutorials you will find step-by-step instructions for:
