I was stimulated to make this tutorial by an interesting discussion on Roxanne’s forum on Ravelry.
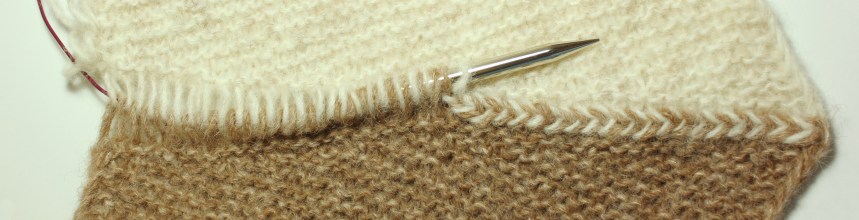
Russian Graft (RG) is a join that connects two rows of live sts without using an extra yarn. It produces a zig-zag seam that is sturdy and decorative. It can be used for shawls, for shoulder seams or for sock toes, instead of Kitchener stitch. It is very easy to make with the hook.
In many existing instructions and videos RG is worked by slipping sts knitwise from both needles. This way the seam is not symmetrical, because the back needle sts are twisted. To keep them open (like the front sts), they need to be slipped purlwise. Compare Symmetrical Russian Graft (SRG) on the left and Russian Graft (RG) on the right.
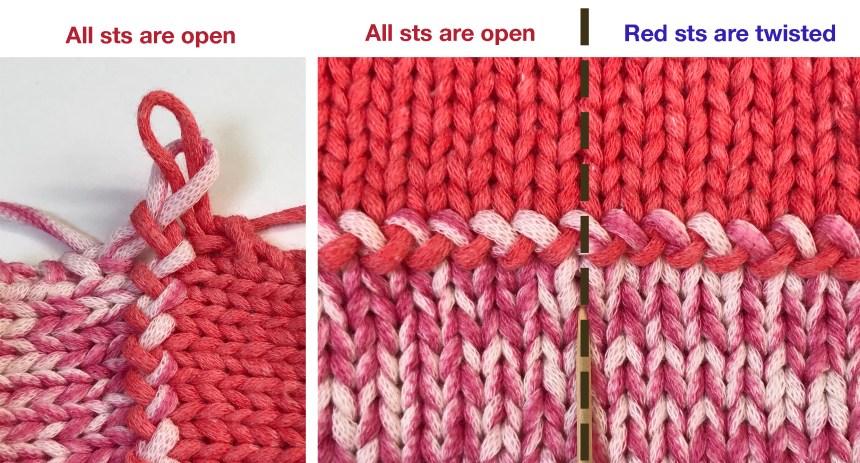
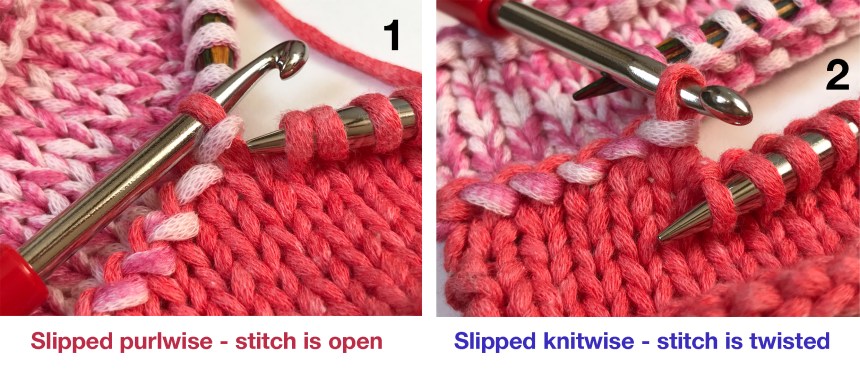
These close-up pictures show how the back needle stitch is twisted when it is slipped knitwise (2). When it is slipped purlwise it is open (1).
You may work RG by slipping sts from front and back needles in the same way. This will work: the non-symmetrical seam appears slightly narrower because sts are twisted. It’s up to you!
To make a fully Symmetrical Russian Graft:
1. Insert the hook into the next st on the front needle knitwise.
2. Slide st off the needle and pull it through the st on the hook.
3. Insert the hook into the next st on the back needle purlwise.
4. Slide st off the needle and pull it through the st on the hook.
Repeat 4 steps.

Tip: If you can’t remember “knitwise/purlwise”, there is a trick. Arrange the front needle sts so that they sit with their left legs in front, as in Eastern stitch mount, see photo 1a. To rearrange them, simply slip all front needle sts knitwise onto another needle. Or, in the last row, work them by grabbing the yarn from under, thus sts will automatically be positioned correctly.

Tip: If you have difficulties holding two needles and hook together, try this. First prepare sts by slipping them from two needles onto one: simply alternate sts from front and back needle. At the same time you can rotate the front needle sts by slipping them knitwise. Now work SRG by slipping sts one by one purlwise from one needle and binding them off with the hook.
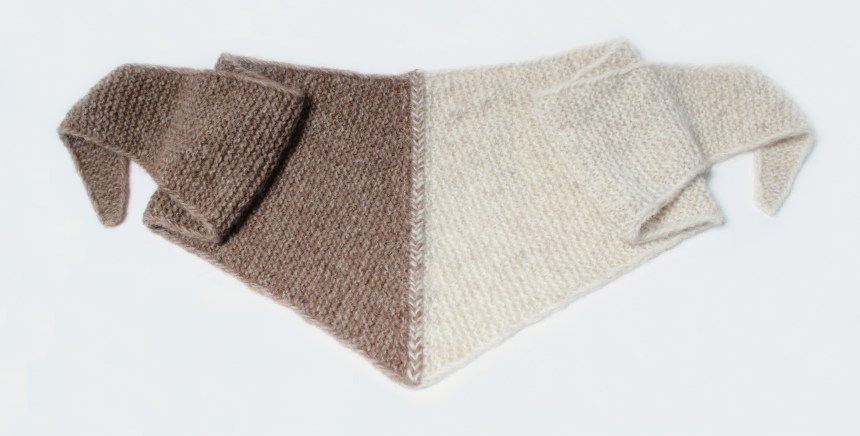
The photo below shows the process of working Distich SRG on the shawl presented in the book. The Oat Plait Shawlette is worked in Garter stitch with slip DS selvedge, two coloured triangles are connected in the centre with the decorative plait.
The stitches are slipped from the needle one by one, and worked distitchwise. Tutorials how to crochet Distitch can be found here.
