The loop join is a perfect choice to work intarsia – you take care of all the yarn ends as you go. The new colour may be required to be joined on the right or wrong side of the knitting. Equally, you may need to end the yarn on either side. Here are detailed instructions for all 4 possible cases using the loop join (A, B, C and D), as well as 2 cases for using the sliding loop join.
The loop join
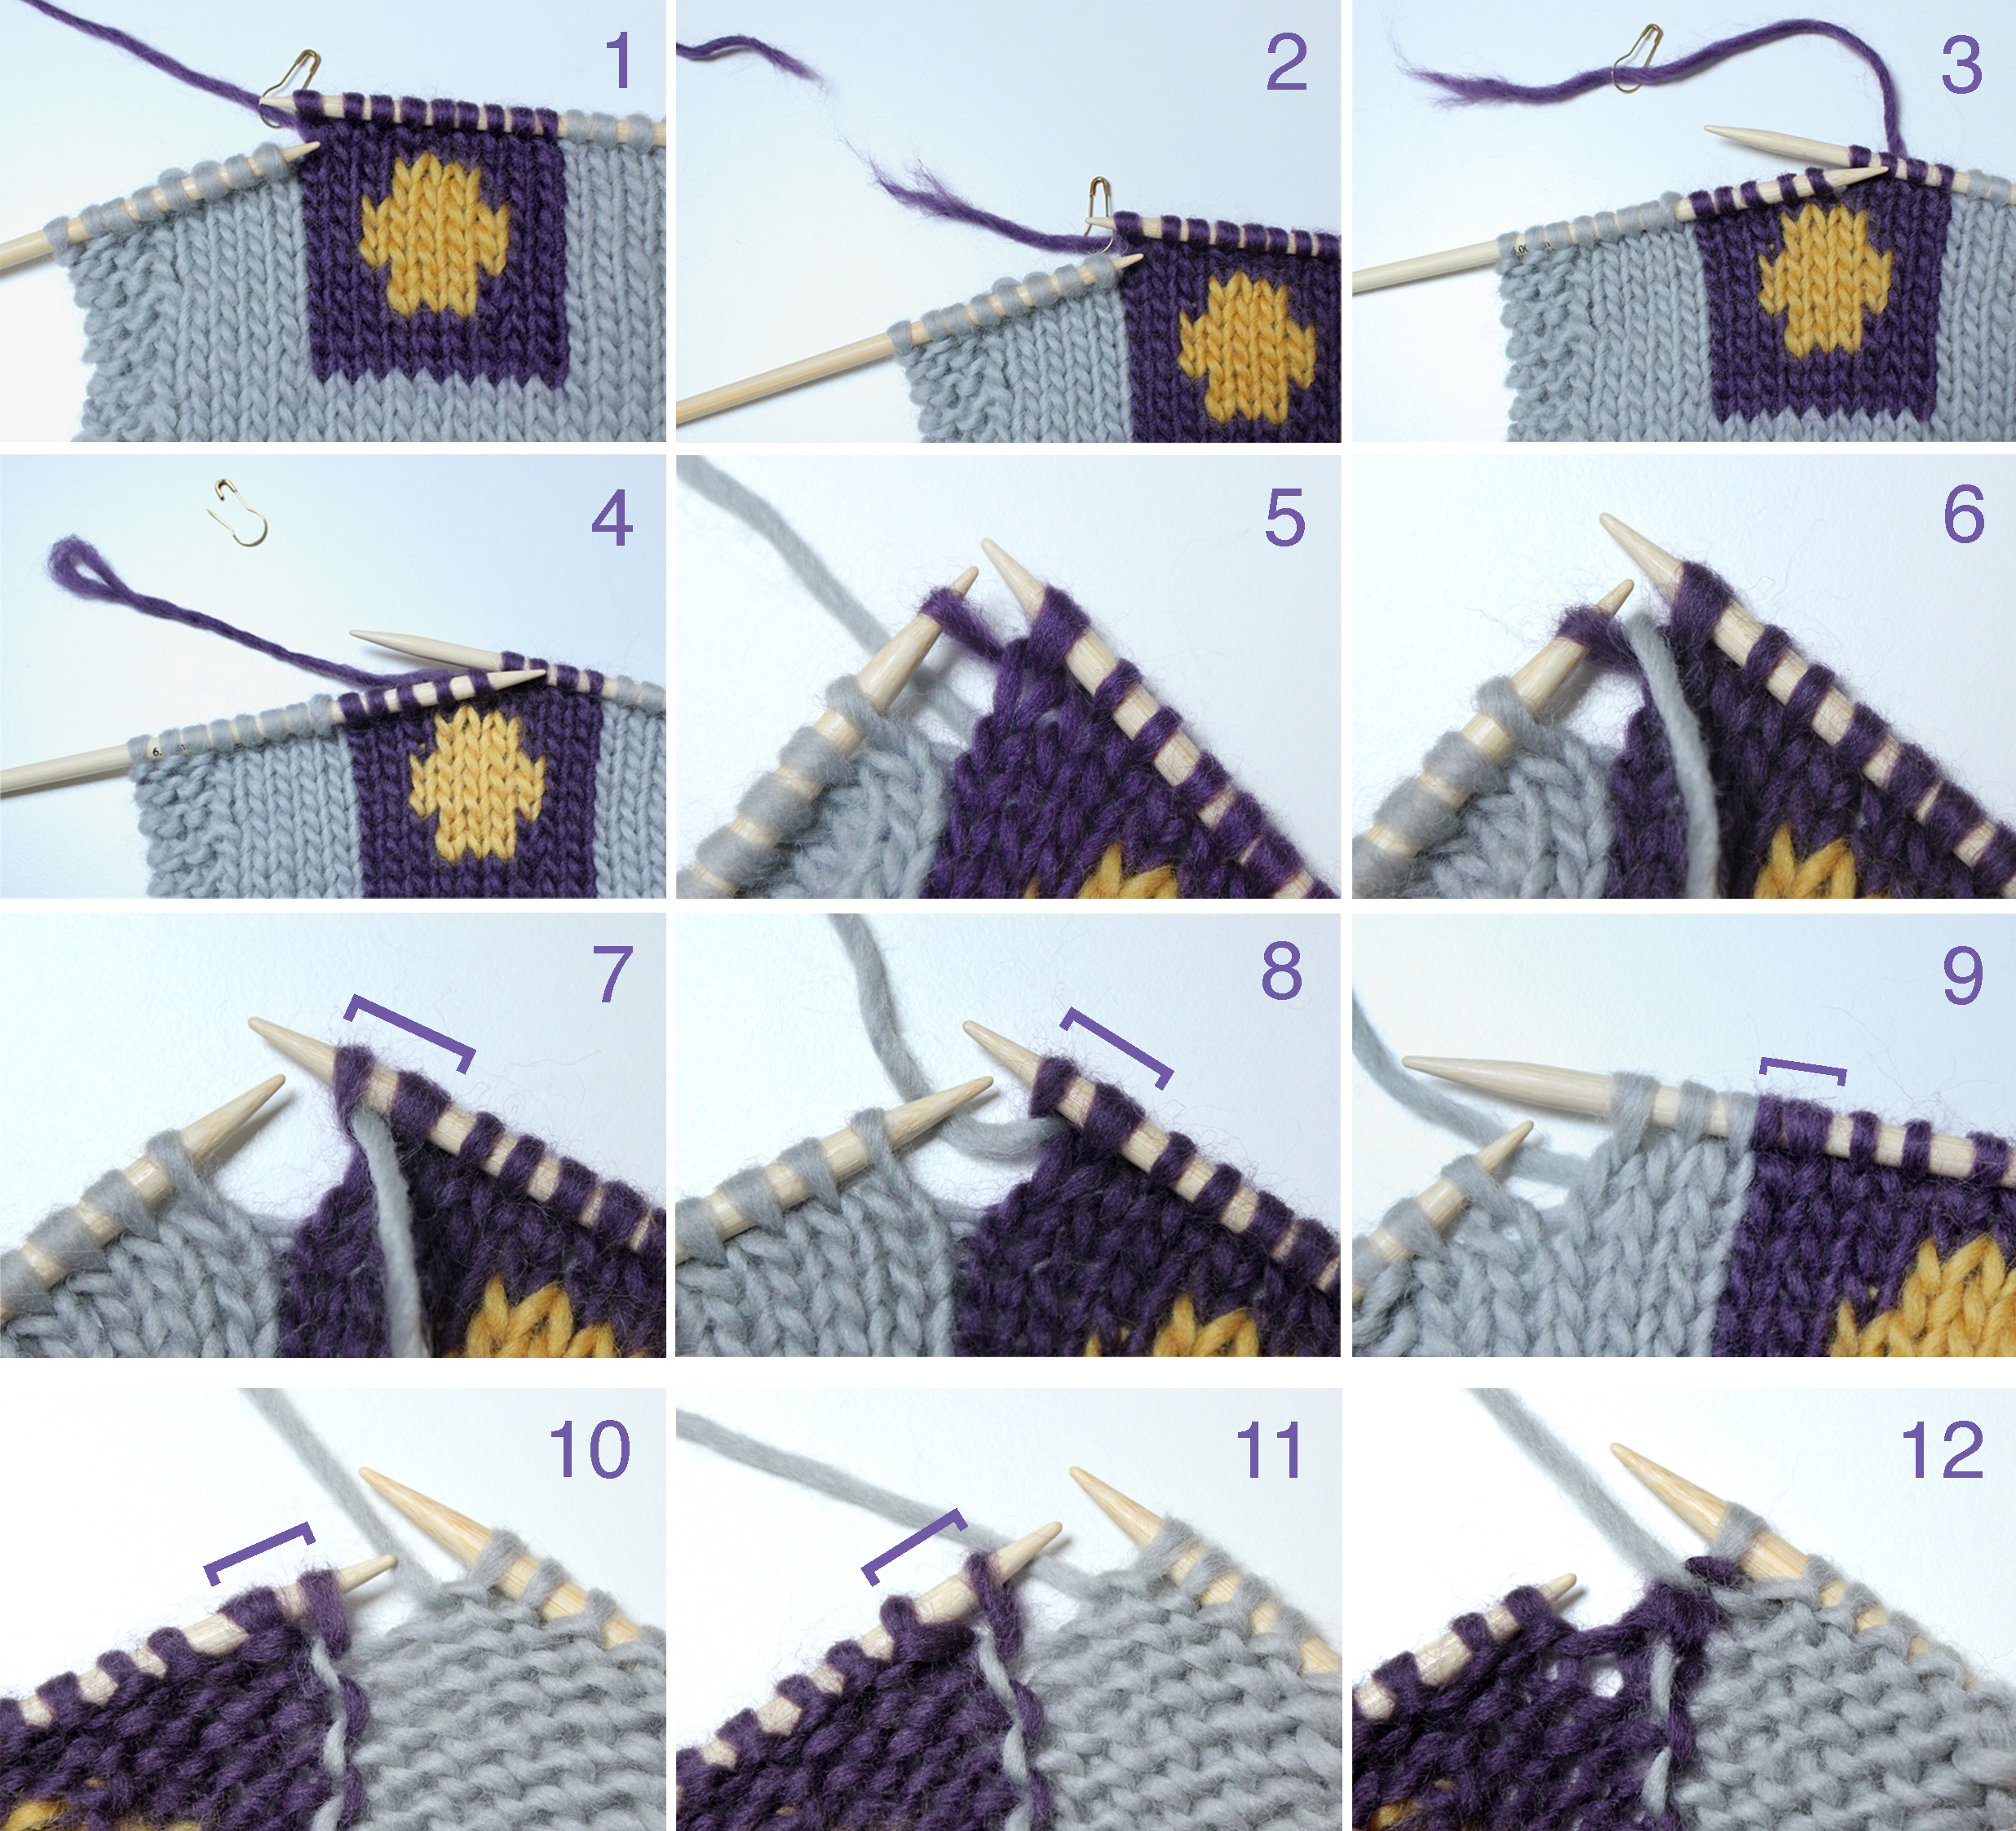
A. New colour starts on the right side of Stocking stitch.


B. New colour starts on the wrong side of Stocking stitch.

1. To twist the new yarn with the current yarn, lay the loop end over the current yarn and hang the loop on the right needle. 2. Bring the previous yarn to the front and to the right. 3. Purl the next stitch using new yarn, tighten the yarn to adjust the stitch size. There are two loops of the new colour on the right needle, which count as one stitch. They are indicated by the square bracket ]. Continue as usual. 4-6. When required, join the next colour yarn by repeating steps 1-3 above. 7. After completing the first row with two yarn changes, there are two stitches doubled with their respective loop ends.
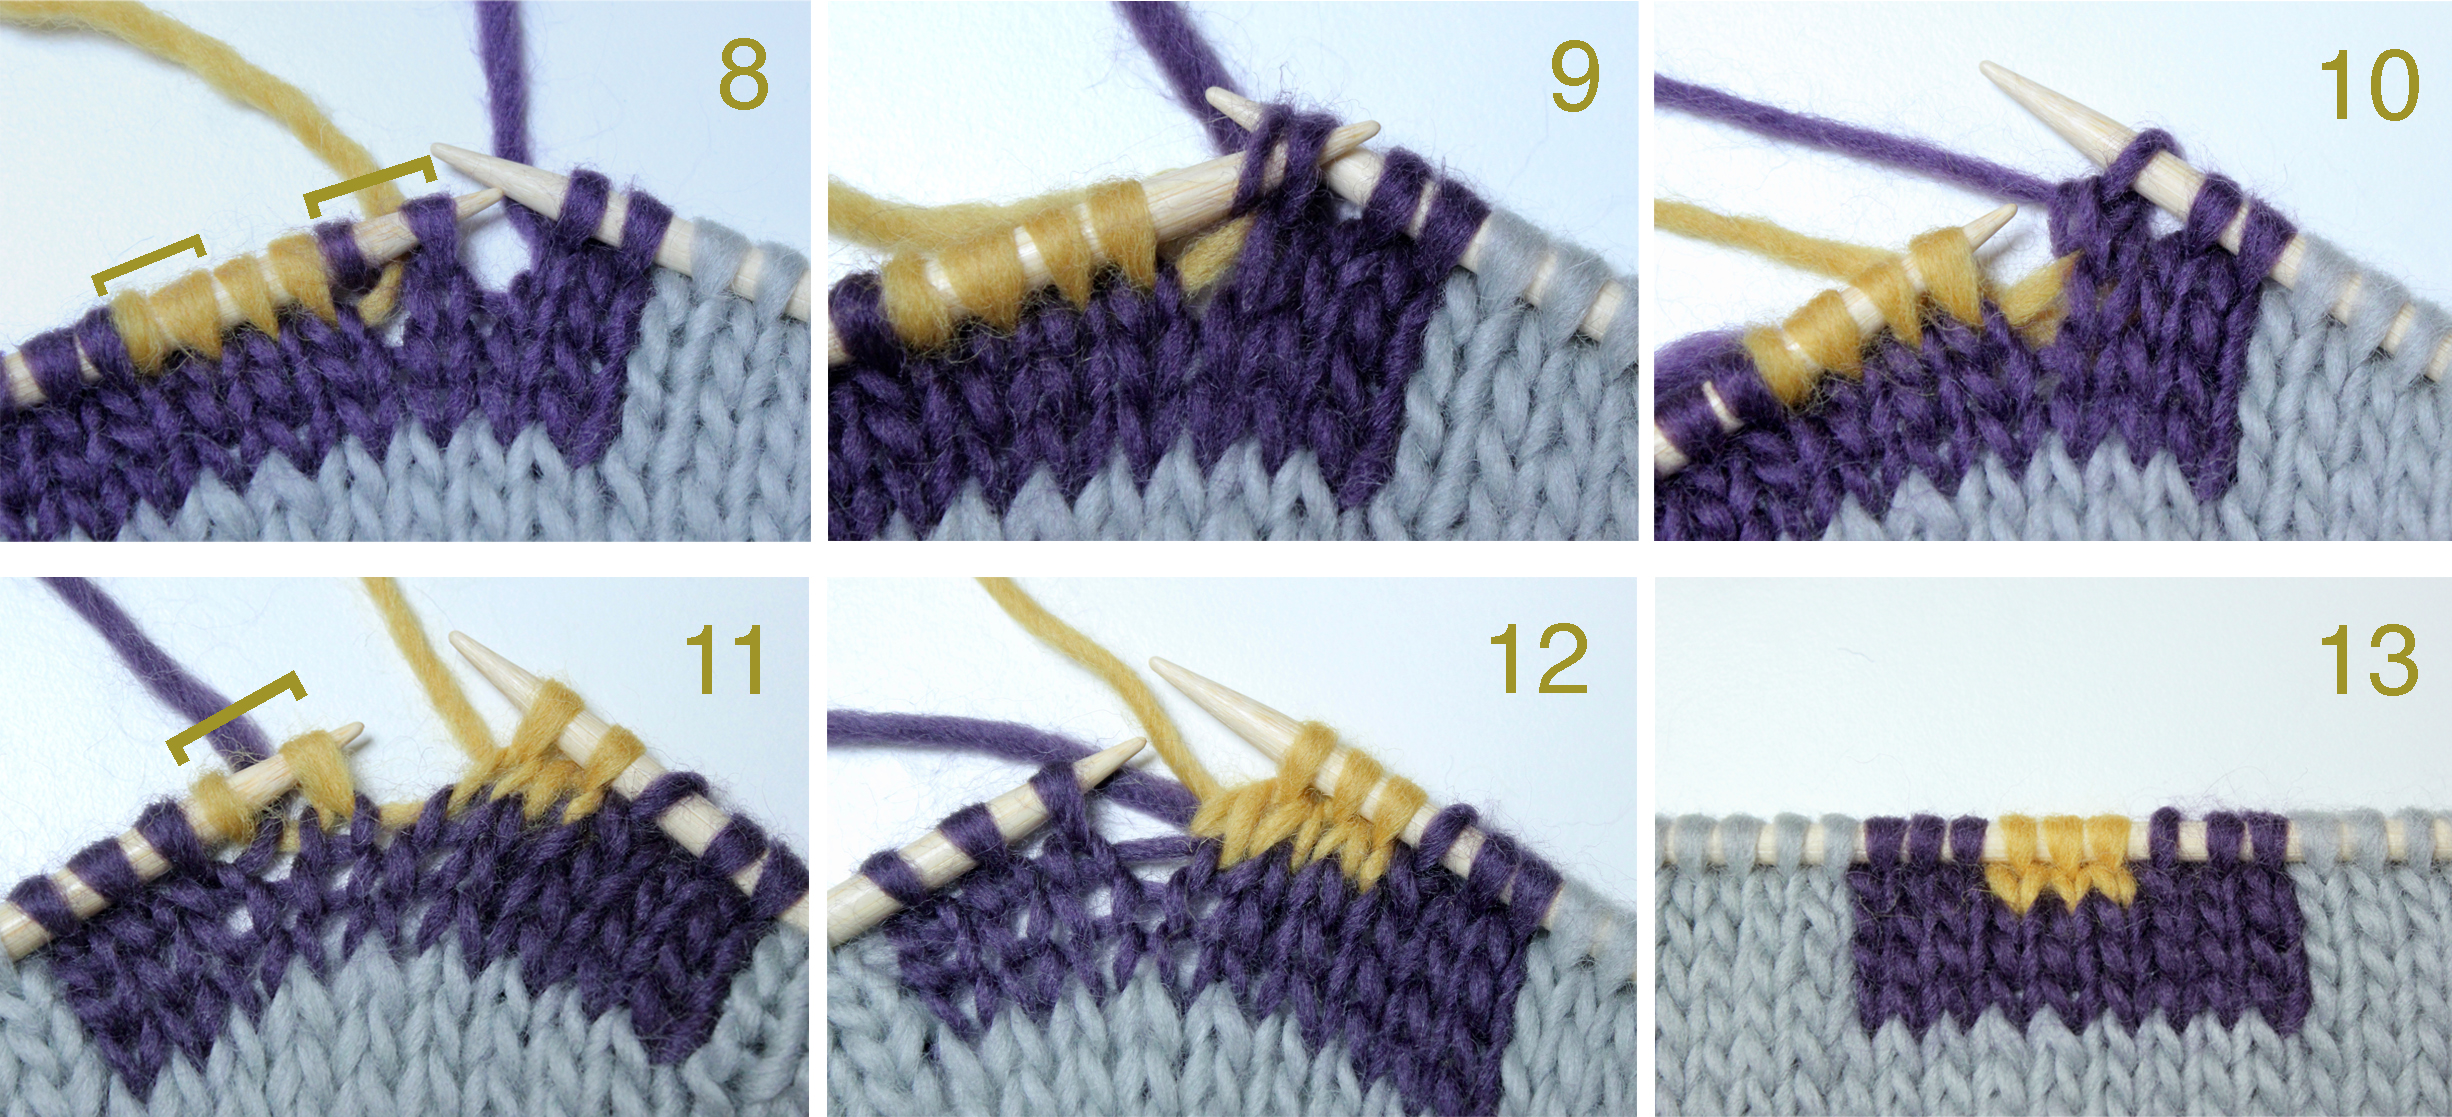
C. New colour finishes on the right side of Stocking stitch.
10. In the next row, on the wrong side of knitting, purl to the doubled stitch. 11. Work the doubled stitch using p2tog tbl: purl the stitch and the loop together as one through the back loops. 12. Continue as usual.
D. New colour finishes on the wrong side of Stocking stitch.
8. In the next row, on the right side of knitting, knit to the doubled stitch. 9. Work the doubled stitch as k2tog: knit the stitch and the loop together as one.
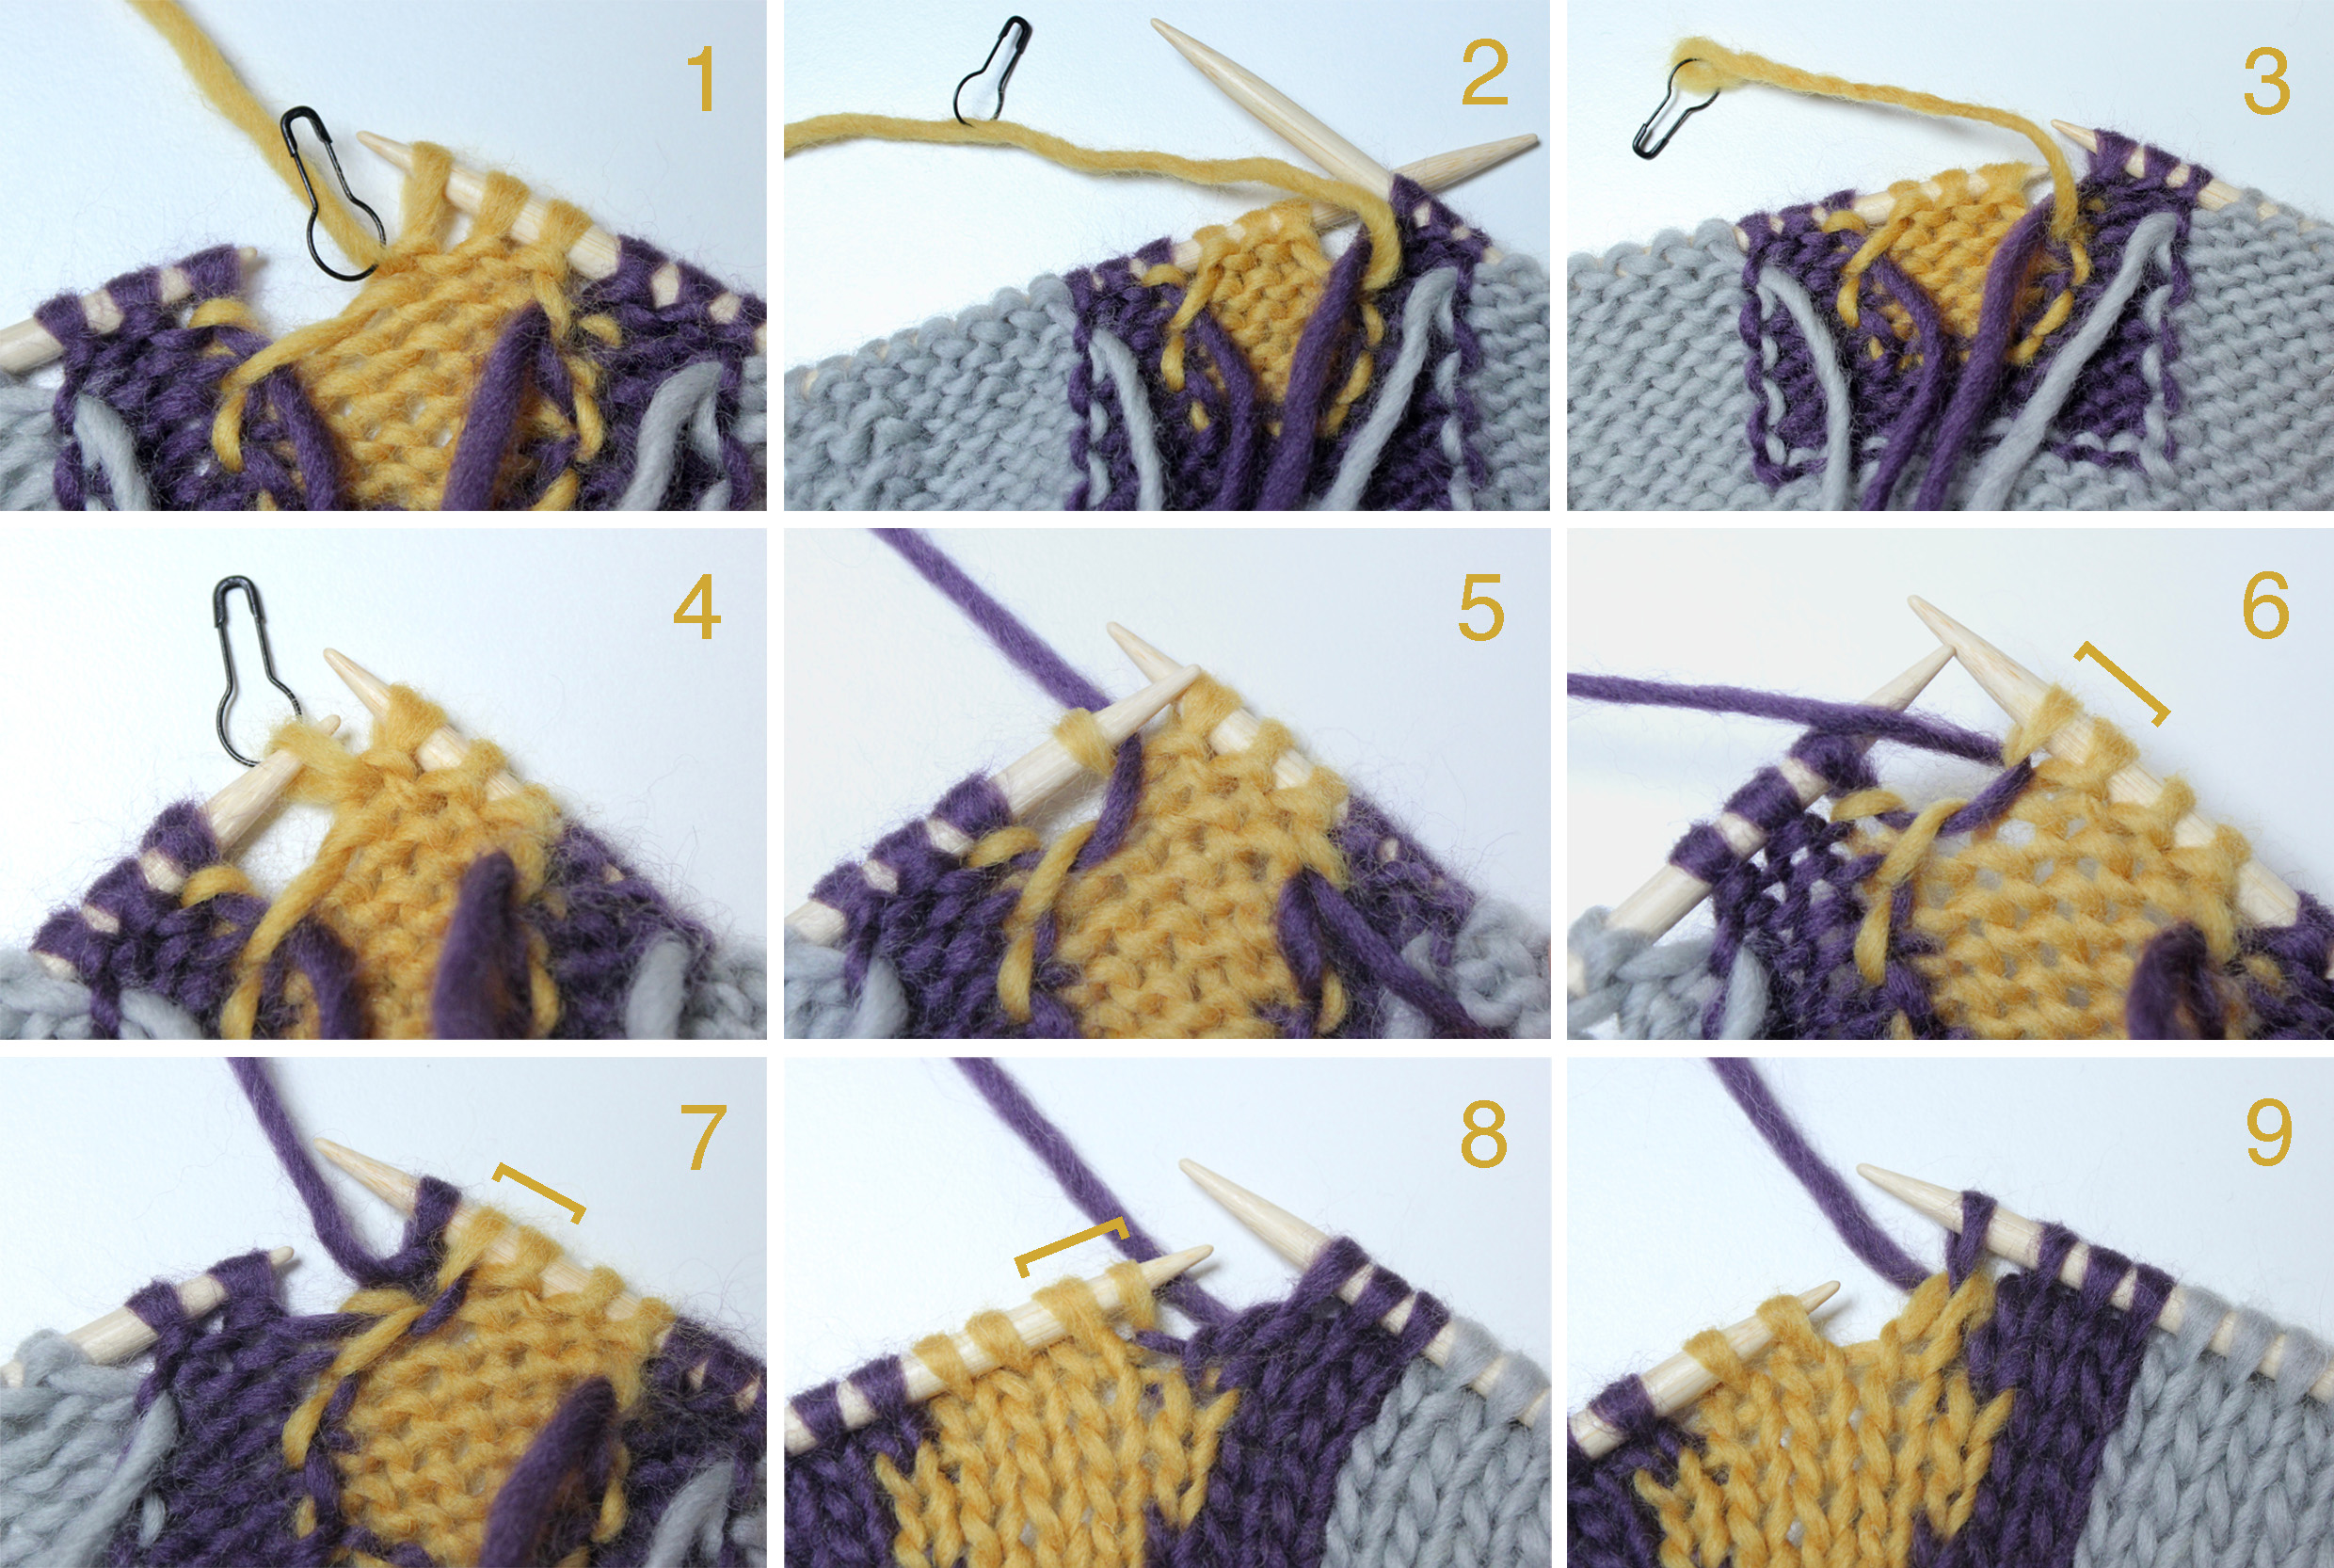
The sliding loop join
I should say here that the sliding loop join can also be used for intarsia. Although it might appear more involved than the loop join, the result is even neater. Here’s how to do it.

4. In the next row continue to work in intarsia technique as usual. 5. Twist the yarns anticlockwise. 6. The arrow points to the sliding loop.
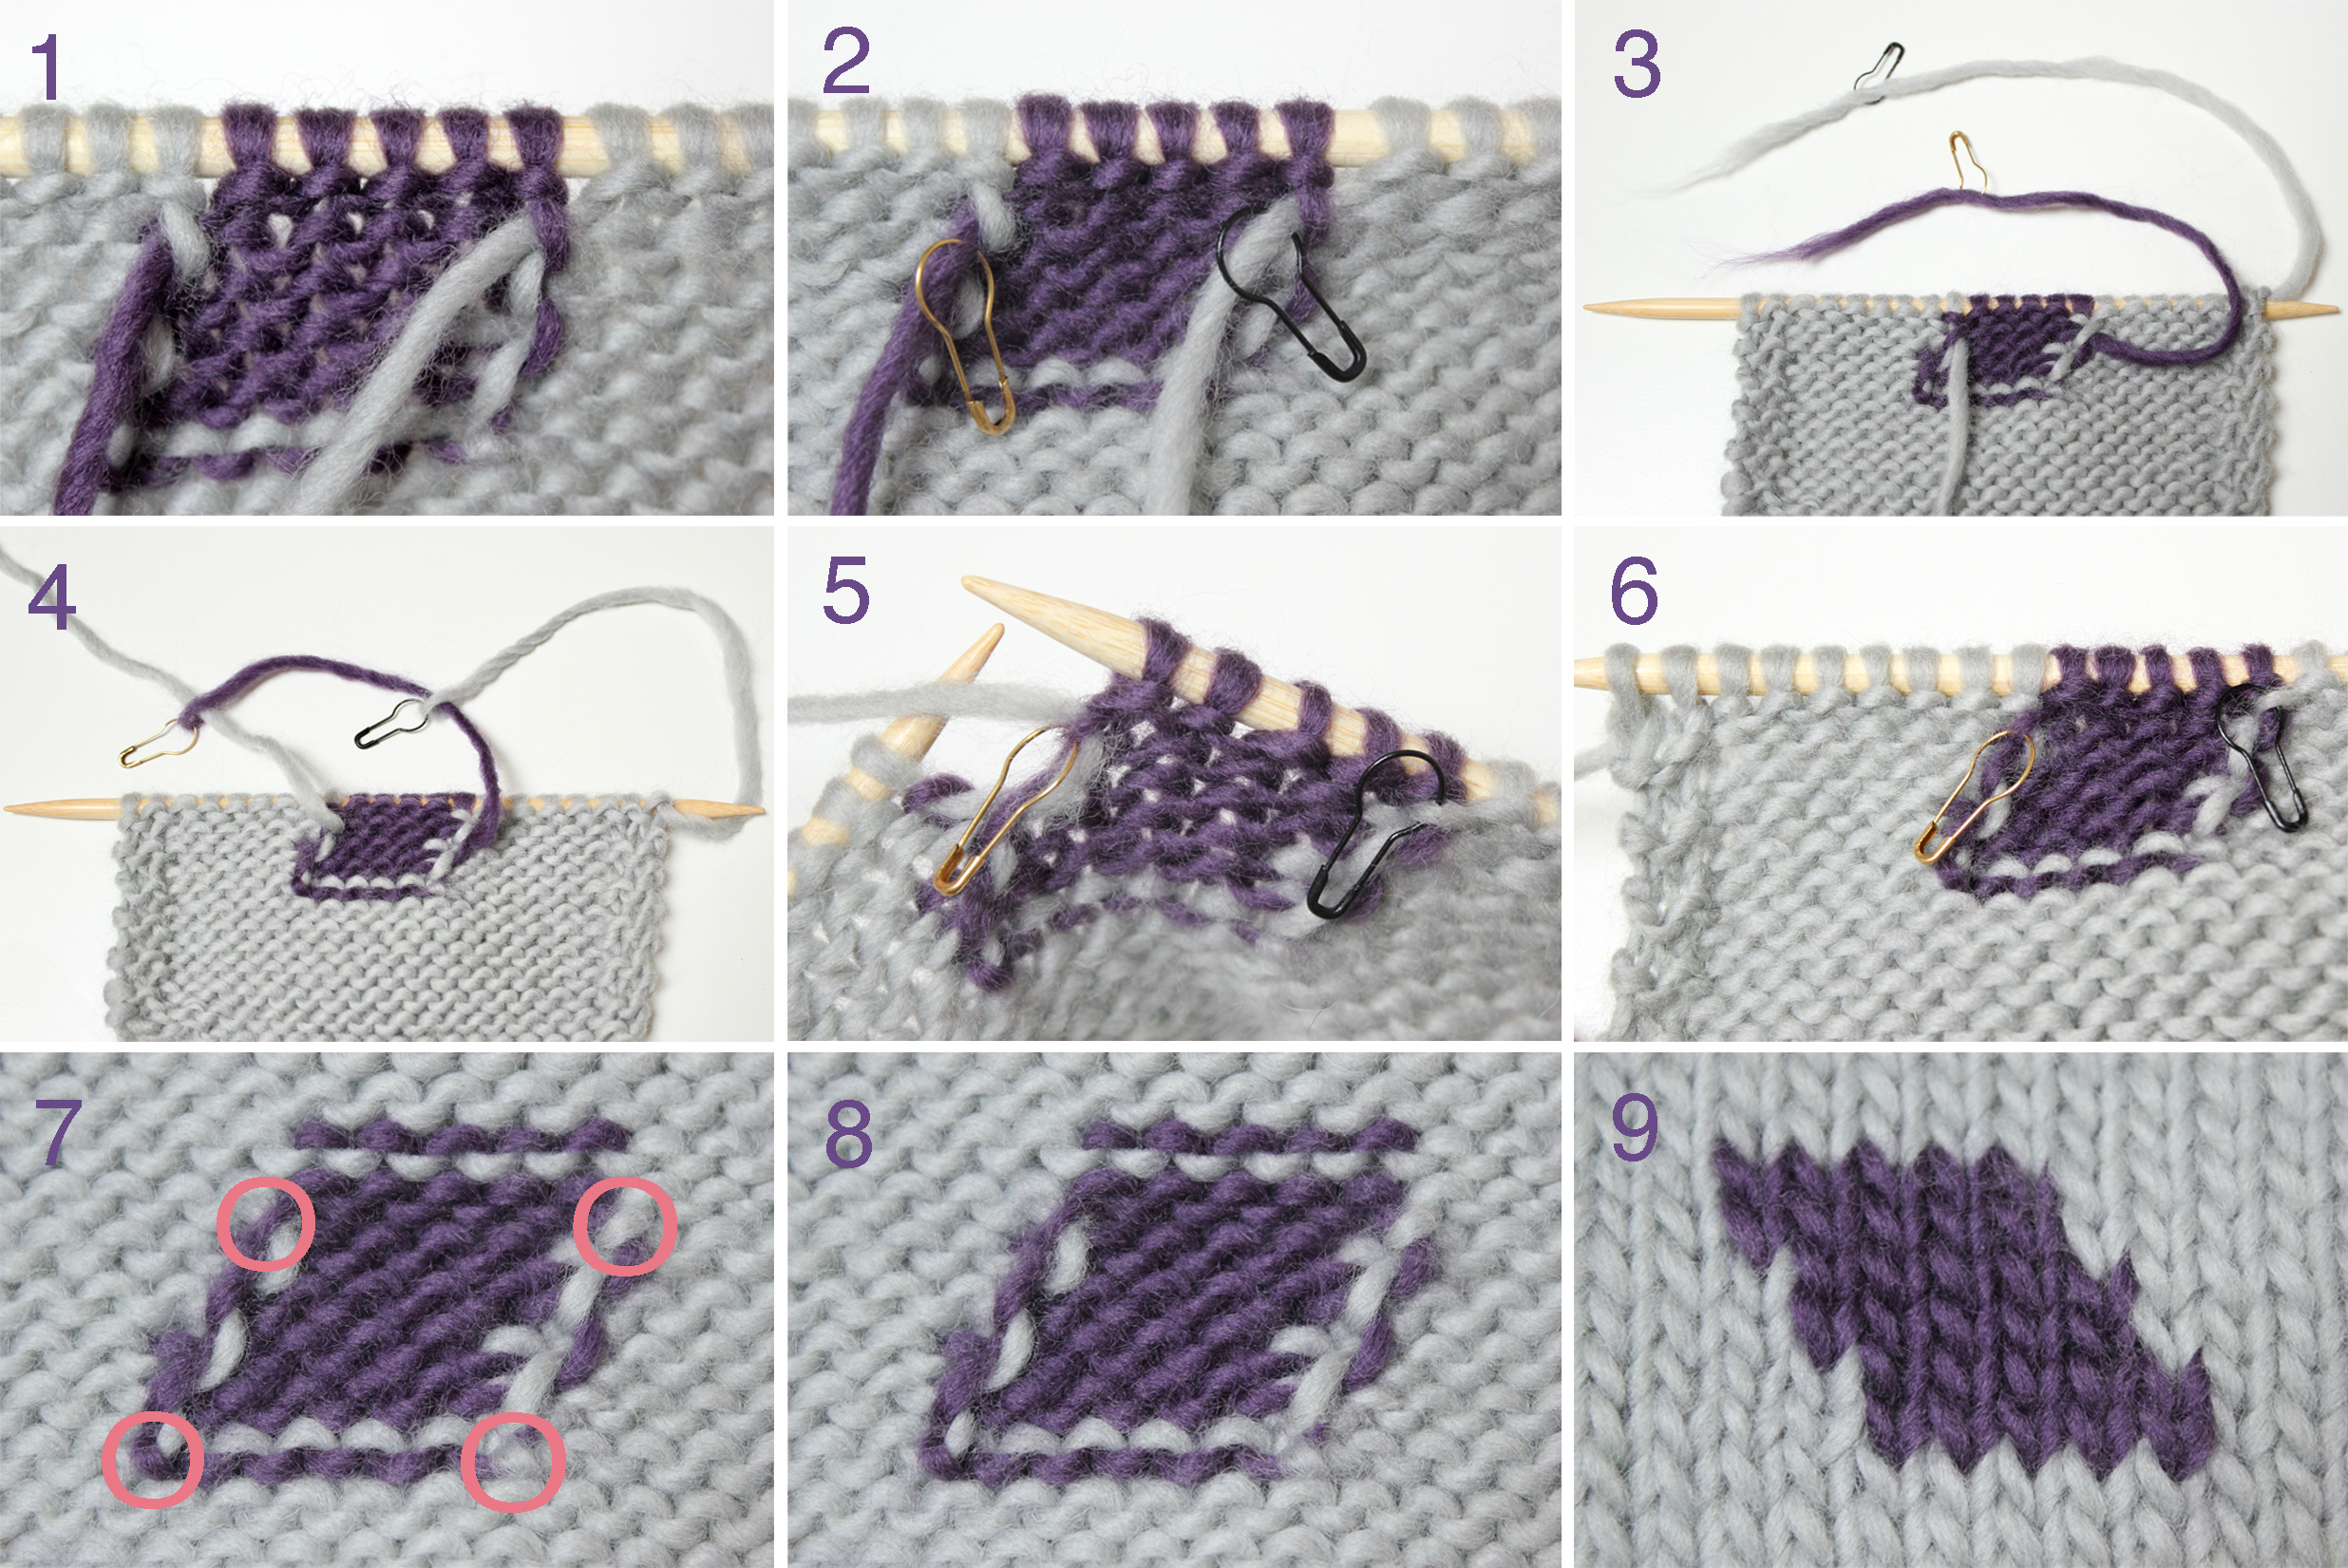
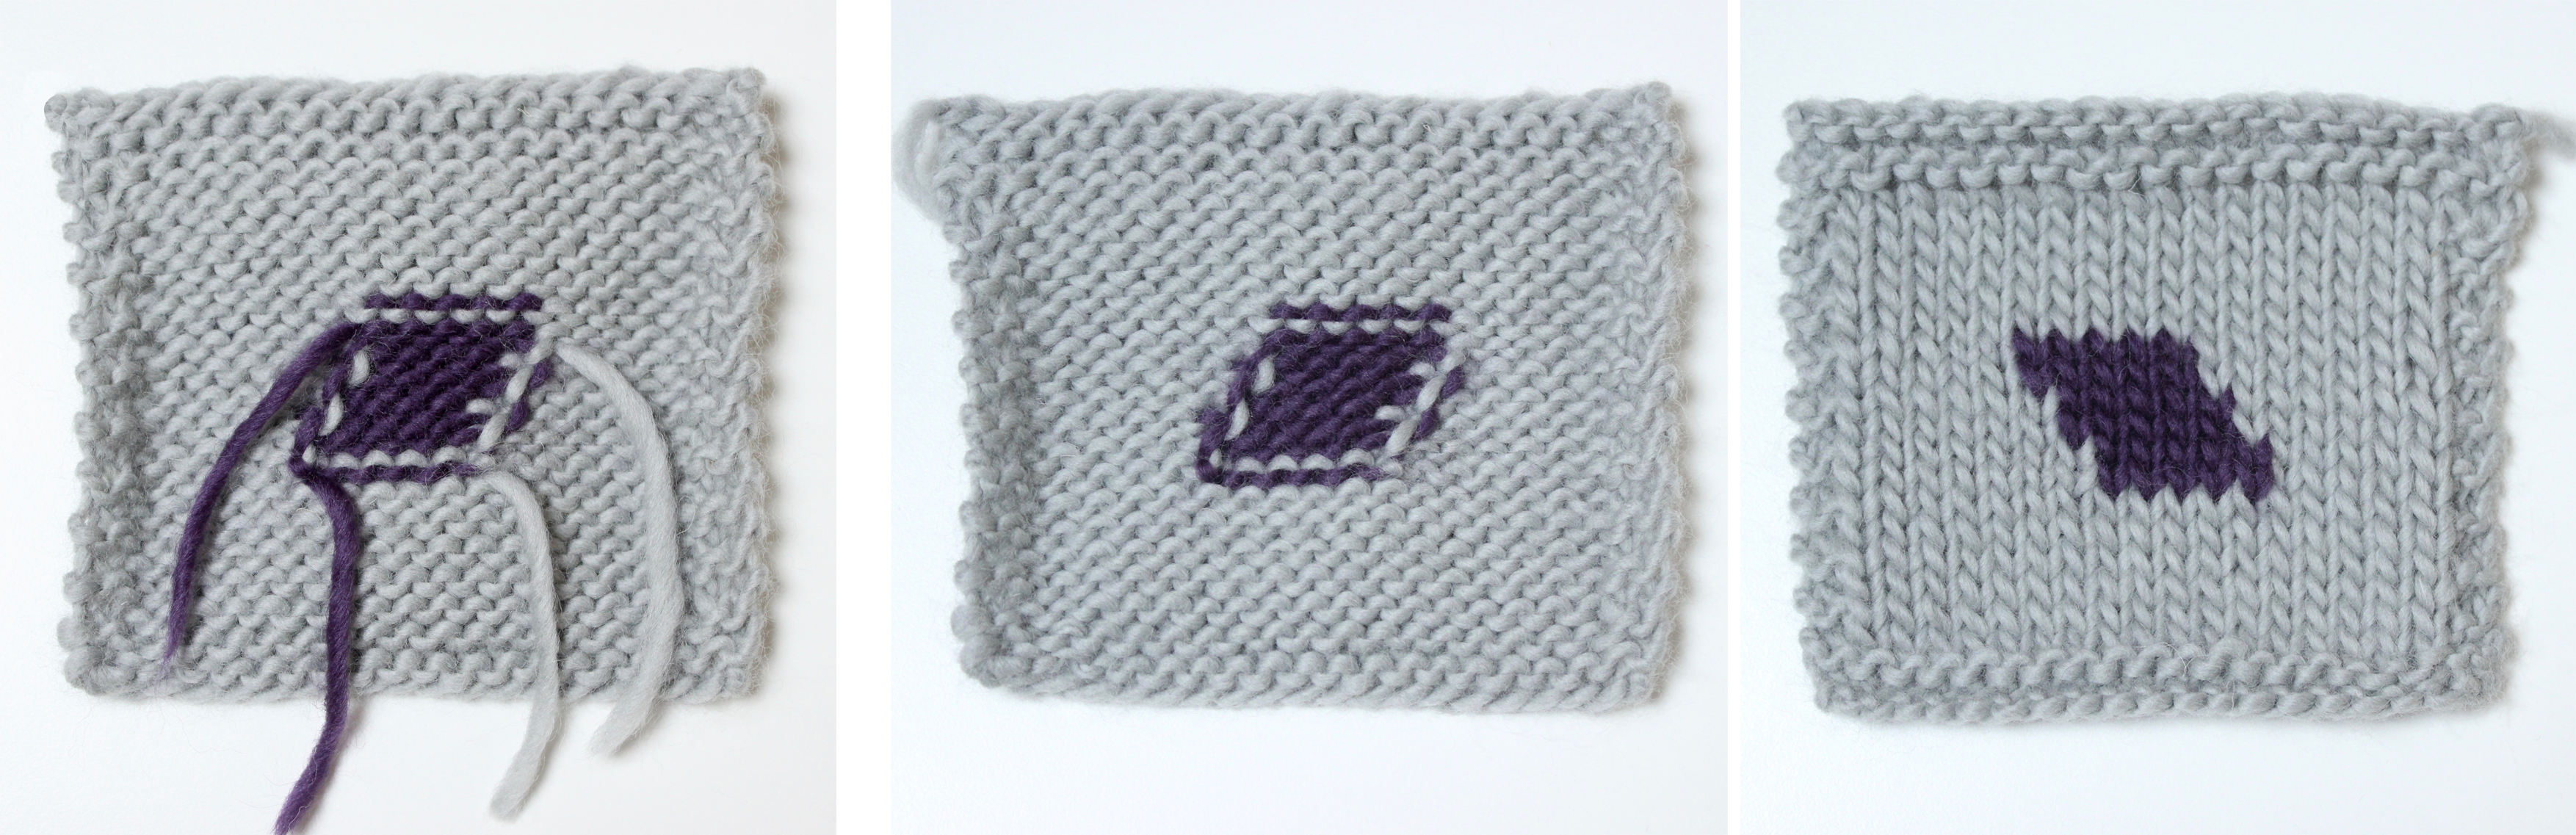
The first picture below demonstrates how the intarsia sample will look if worked in the usual way – with the yarn ends. In the second picture is the sample made by using The sliding loop method.
The intarsia samples were made using:
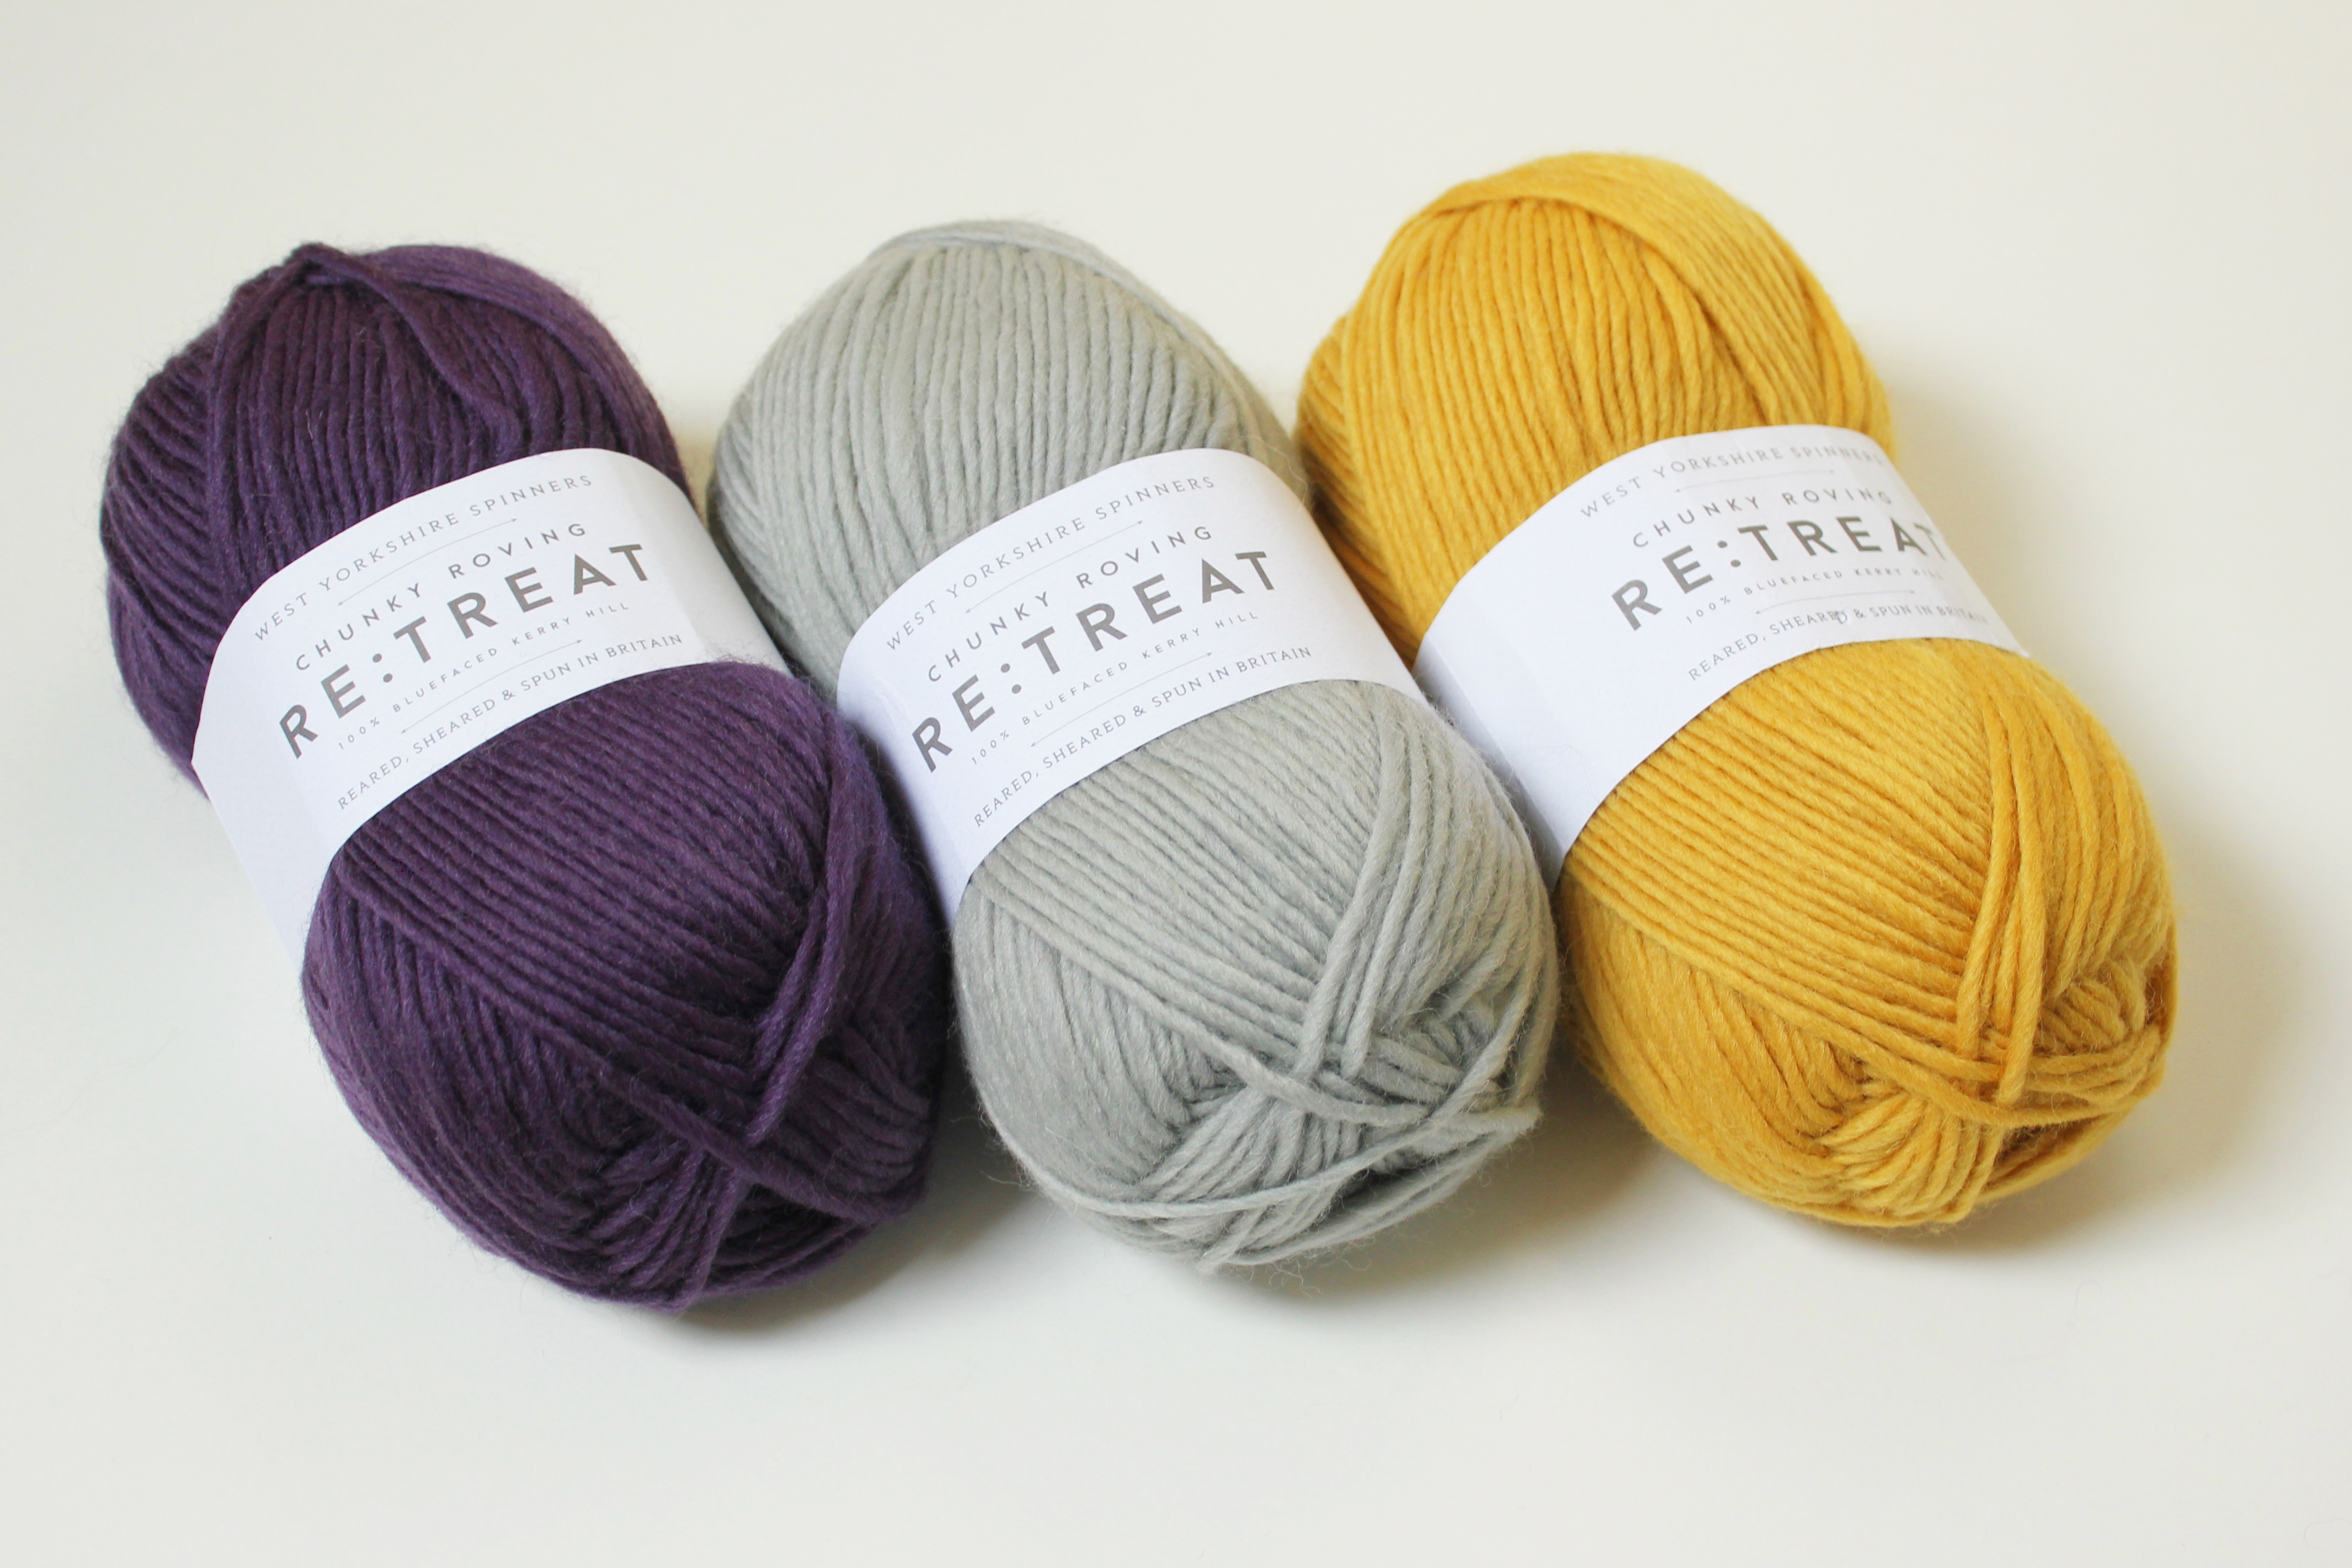
153 yards (140 metres) / 100 g
100% Wool
